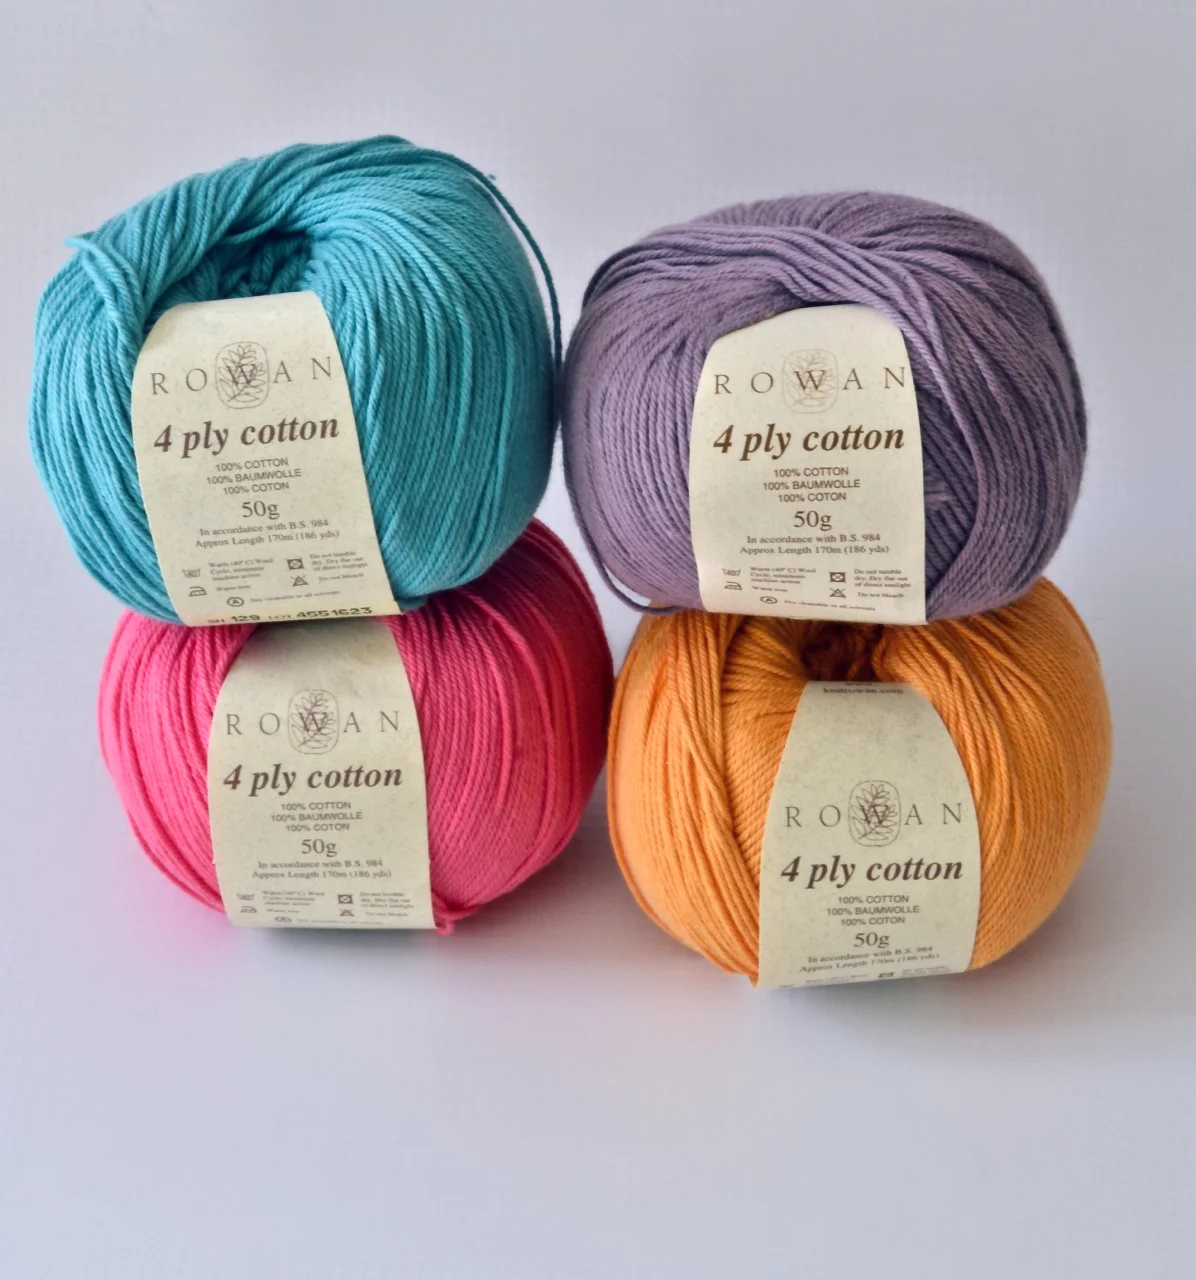
Things I love: Rowan 4 Ply Cotton Yarn

I got fixated on Rowan yarns about ten years ago, before the knitting renaissance, before Ravelry, before Quince and all of the other cool new yarn companies sprung up. Back in 2004 Rowan kind of dominated the quality yarn market. Most stores carried it and it was available online. Not only was it online, but when it arrived it looked and felt as good as you hoped. Not true of all yarns back then.

I bought more than my fair share, when my youngest, AKA, Egg, was a toddler and would still wear hand knit sweaters, if they were cotton. That's when I stumbled upon the Rowan cotton line: their 4ply Cotton, Cotton Glace and Hand Knit Cotton. My youngest daughter still prefers cotton for her sweaters, but rather they are bought at Hollister or American Eagle. Luckily I now have a doll line, because I love knitting with it.

Four of the amazing colors Rowan 4ply cotton came in

Four of the amazing colors Rowan 4ply cotton came in

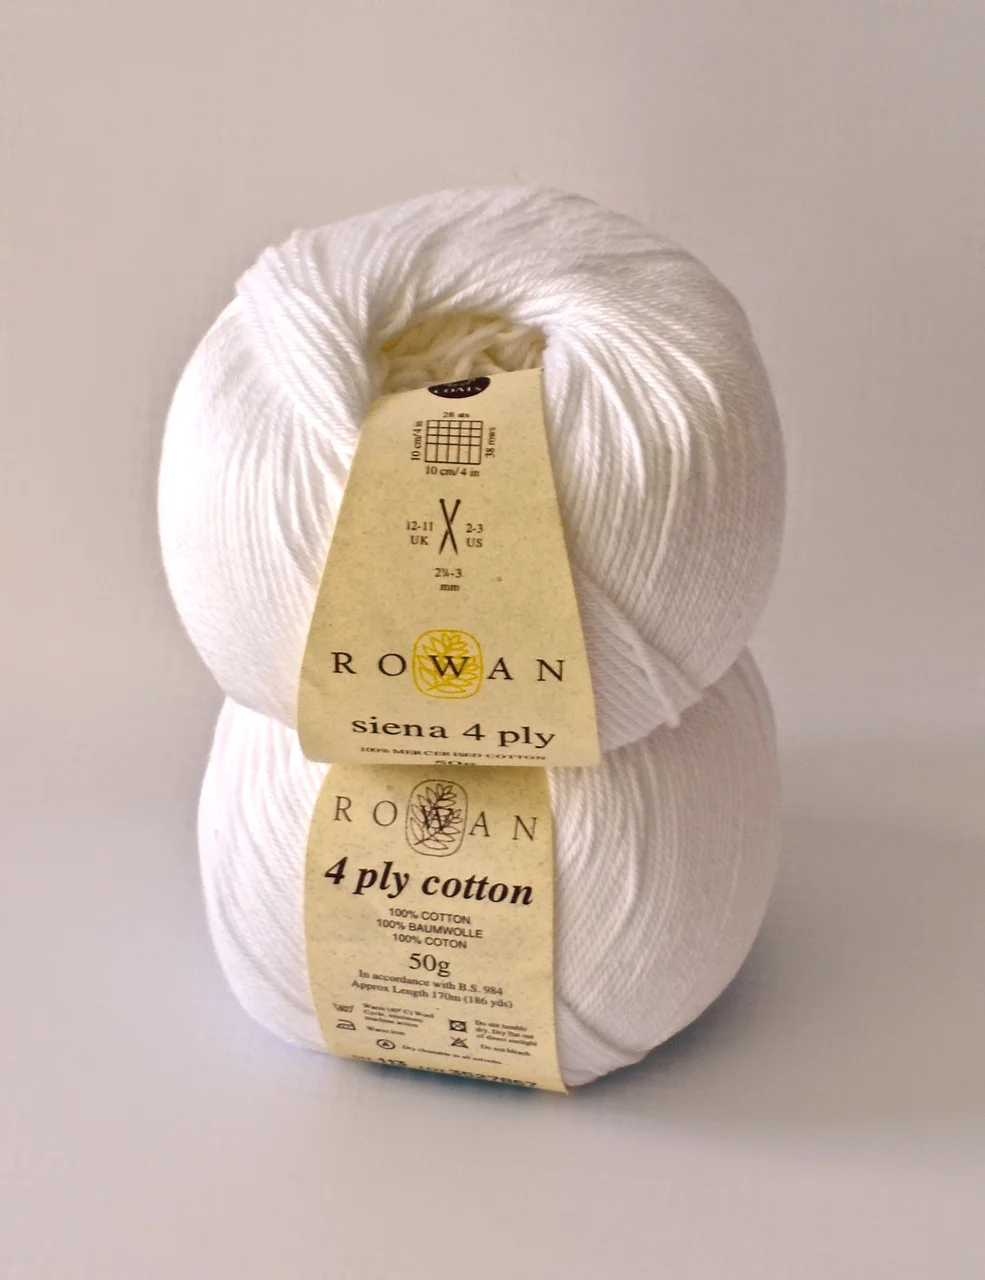
It's a fingering yarn, meaning best knit on US size two needles. I like knitting small. I guess that's why I'm in this business. Sadly, it is discontinued, but still can be found on Ravelry and Ebay. I have a good enough stash that I don't feel panicky about the end of a thing yet. Rowan Siena is a very similar yarn, also recently discontinued but easier to find on the resale market.

Why do I love this yarn? It's soft, but crisp and holds its shape and feels firms to knit with--All qualities that are hard to find in a fine cotton yarn. But mostly it comes in the most amazing colors, fun children's colors, but not too bright. The whites are pretty too. And it has the most subtle but perfect sheen, even after blocking.

Love the color white!

Love the color white!

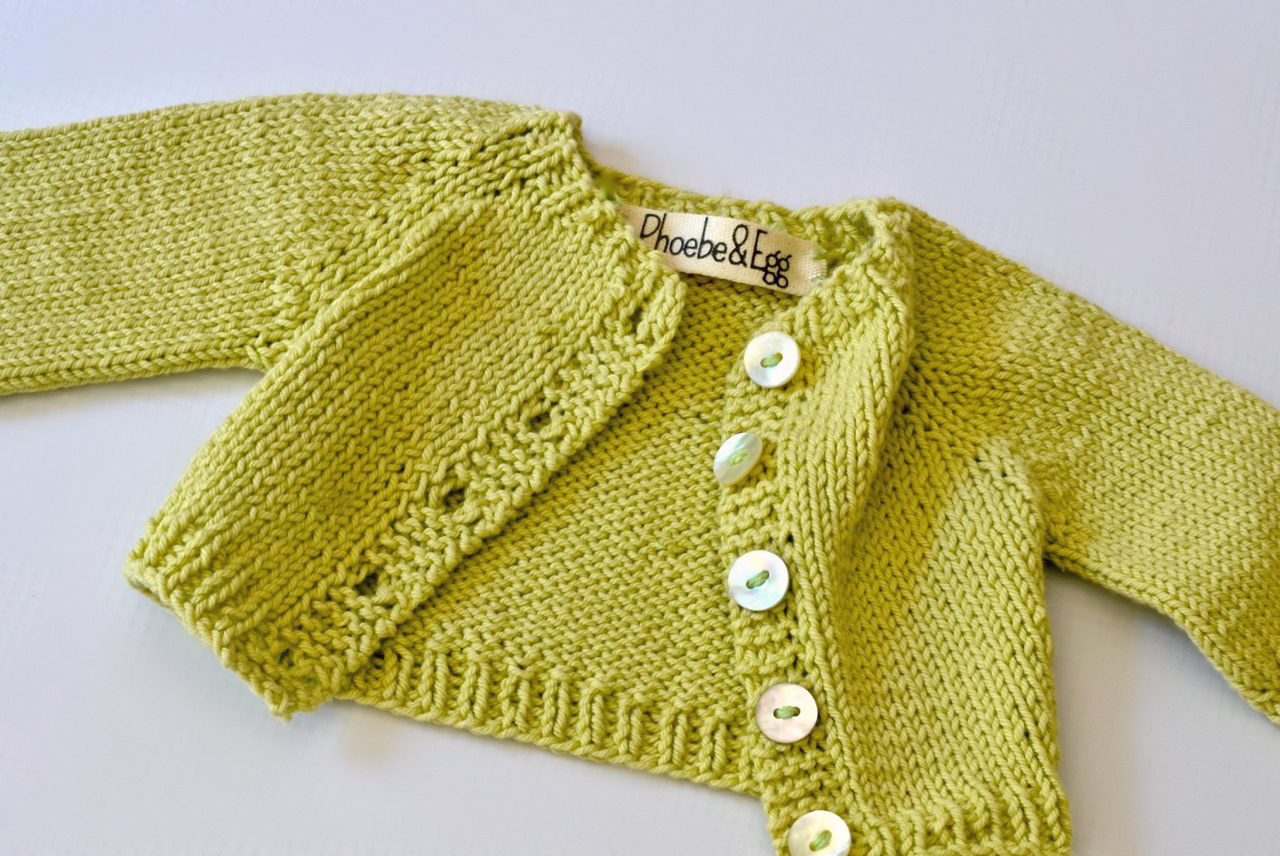
My love affair with this discontinued yarn continues

My love affair with this discontinued yarn continues

Yes, that is my new label peaking through!
Yes, that is my new label peaking through!
Doll Dressmaking Series: The Reversible Dress

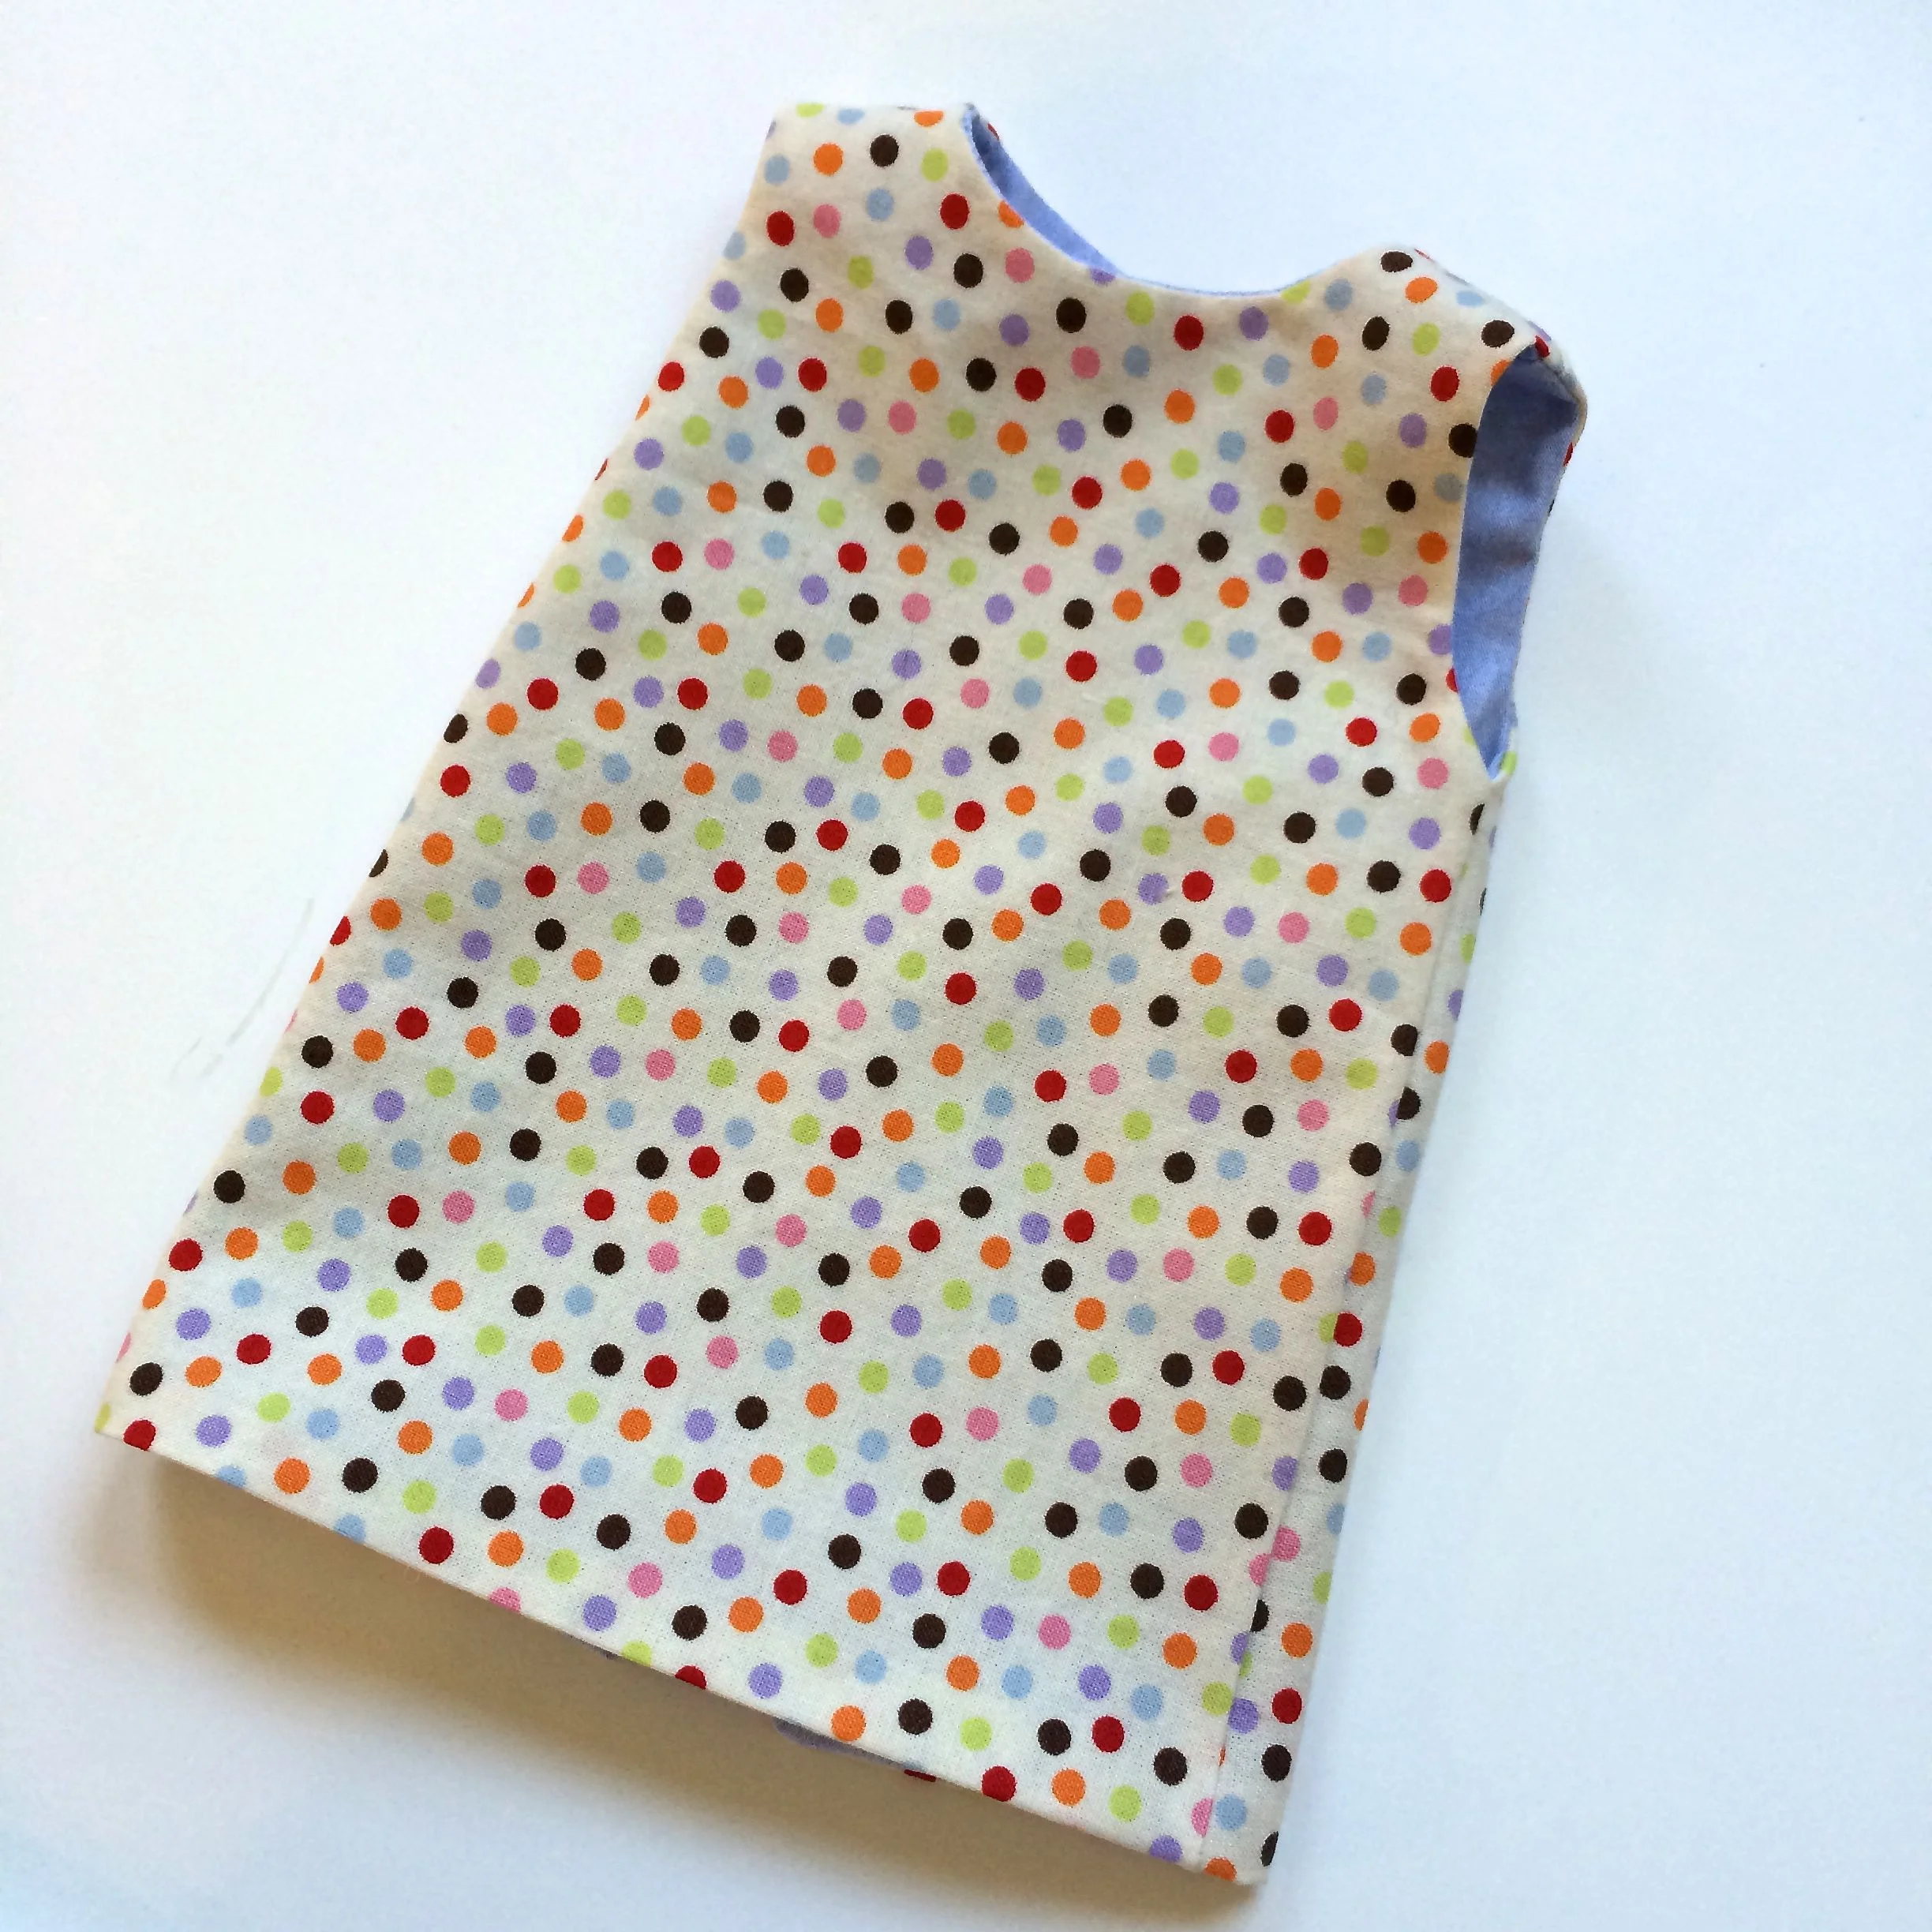
In my last post, I showed you how make a facing for a basic doll dress. A facing is one way to finish raw edges. When you line a simple sleeveless dress, you something extra, a reversible  dress. Cute, simple and a bit magical from a child's point of view.

How to line a simple doll dress. Makes a sweet reversible dress.

How to line a simple doll dress. Makes a sweet reversible dress.

There are several things to consider when choosing your two fabrics:

  1. Fabric weight. Quilting cotton is as heavy as you can go. Two layers of anything heavier at a doll's size will be too bulky and the seams will get bunchy.
  2. Color. Quilting cotton is not completely opaque. So choose  fabrics where you won't see one fabric through the other. Bothe light or both dark. 
  3. If you just want a lining, white is fine. White cotton lawn is good too, since it is so lightweight.
  4. Don't choose something that shreds or unravels too easily, like many linens. With a quarter inch seams, you may have some unraveling seams and once the dress is finished and "sealed up" you have no way of going back in and fixing any seam gaps. For one fabric I used quilting cotton, but for the other I used oxford cloth shirting, which does fray a bit.

Make two copies of your basic dress pattern and pin and cut one out of each fabric.

There are several things to consider when choosing your two fabrics.

There are several things to consider when choosing your two fabrics.

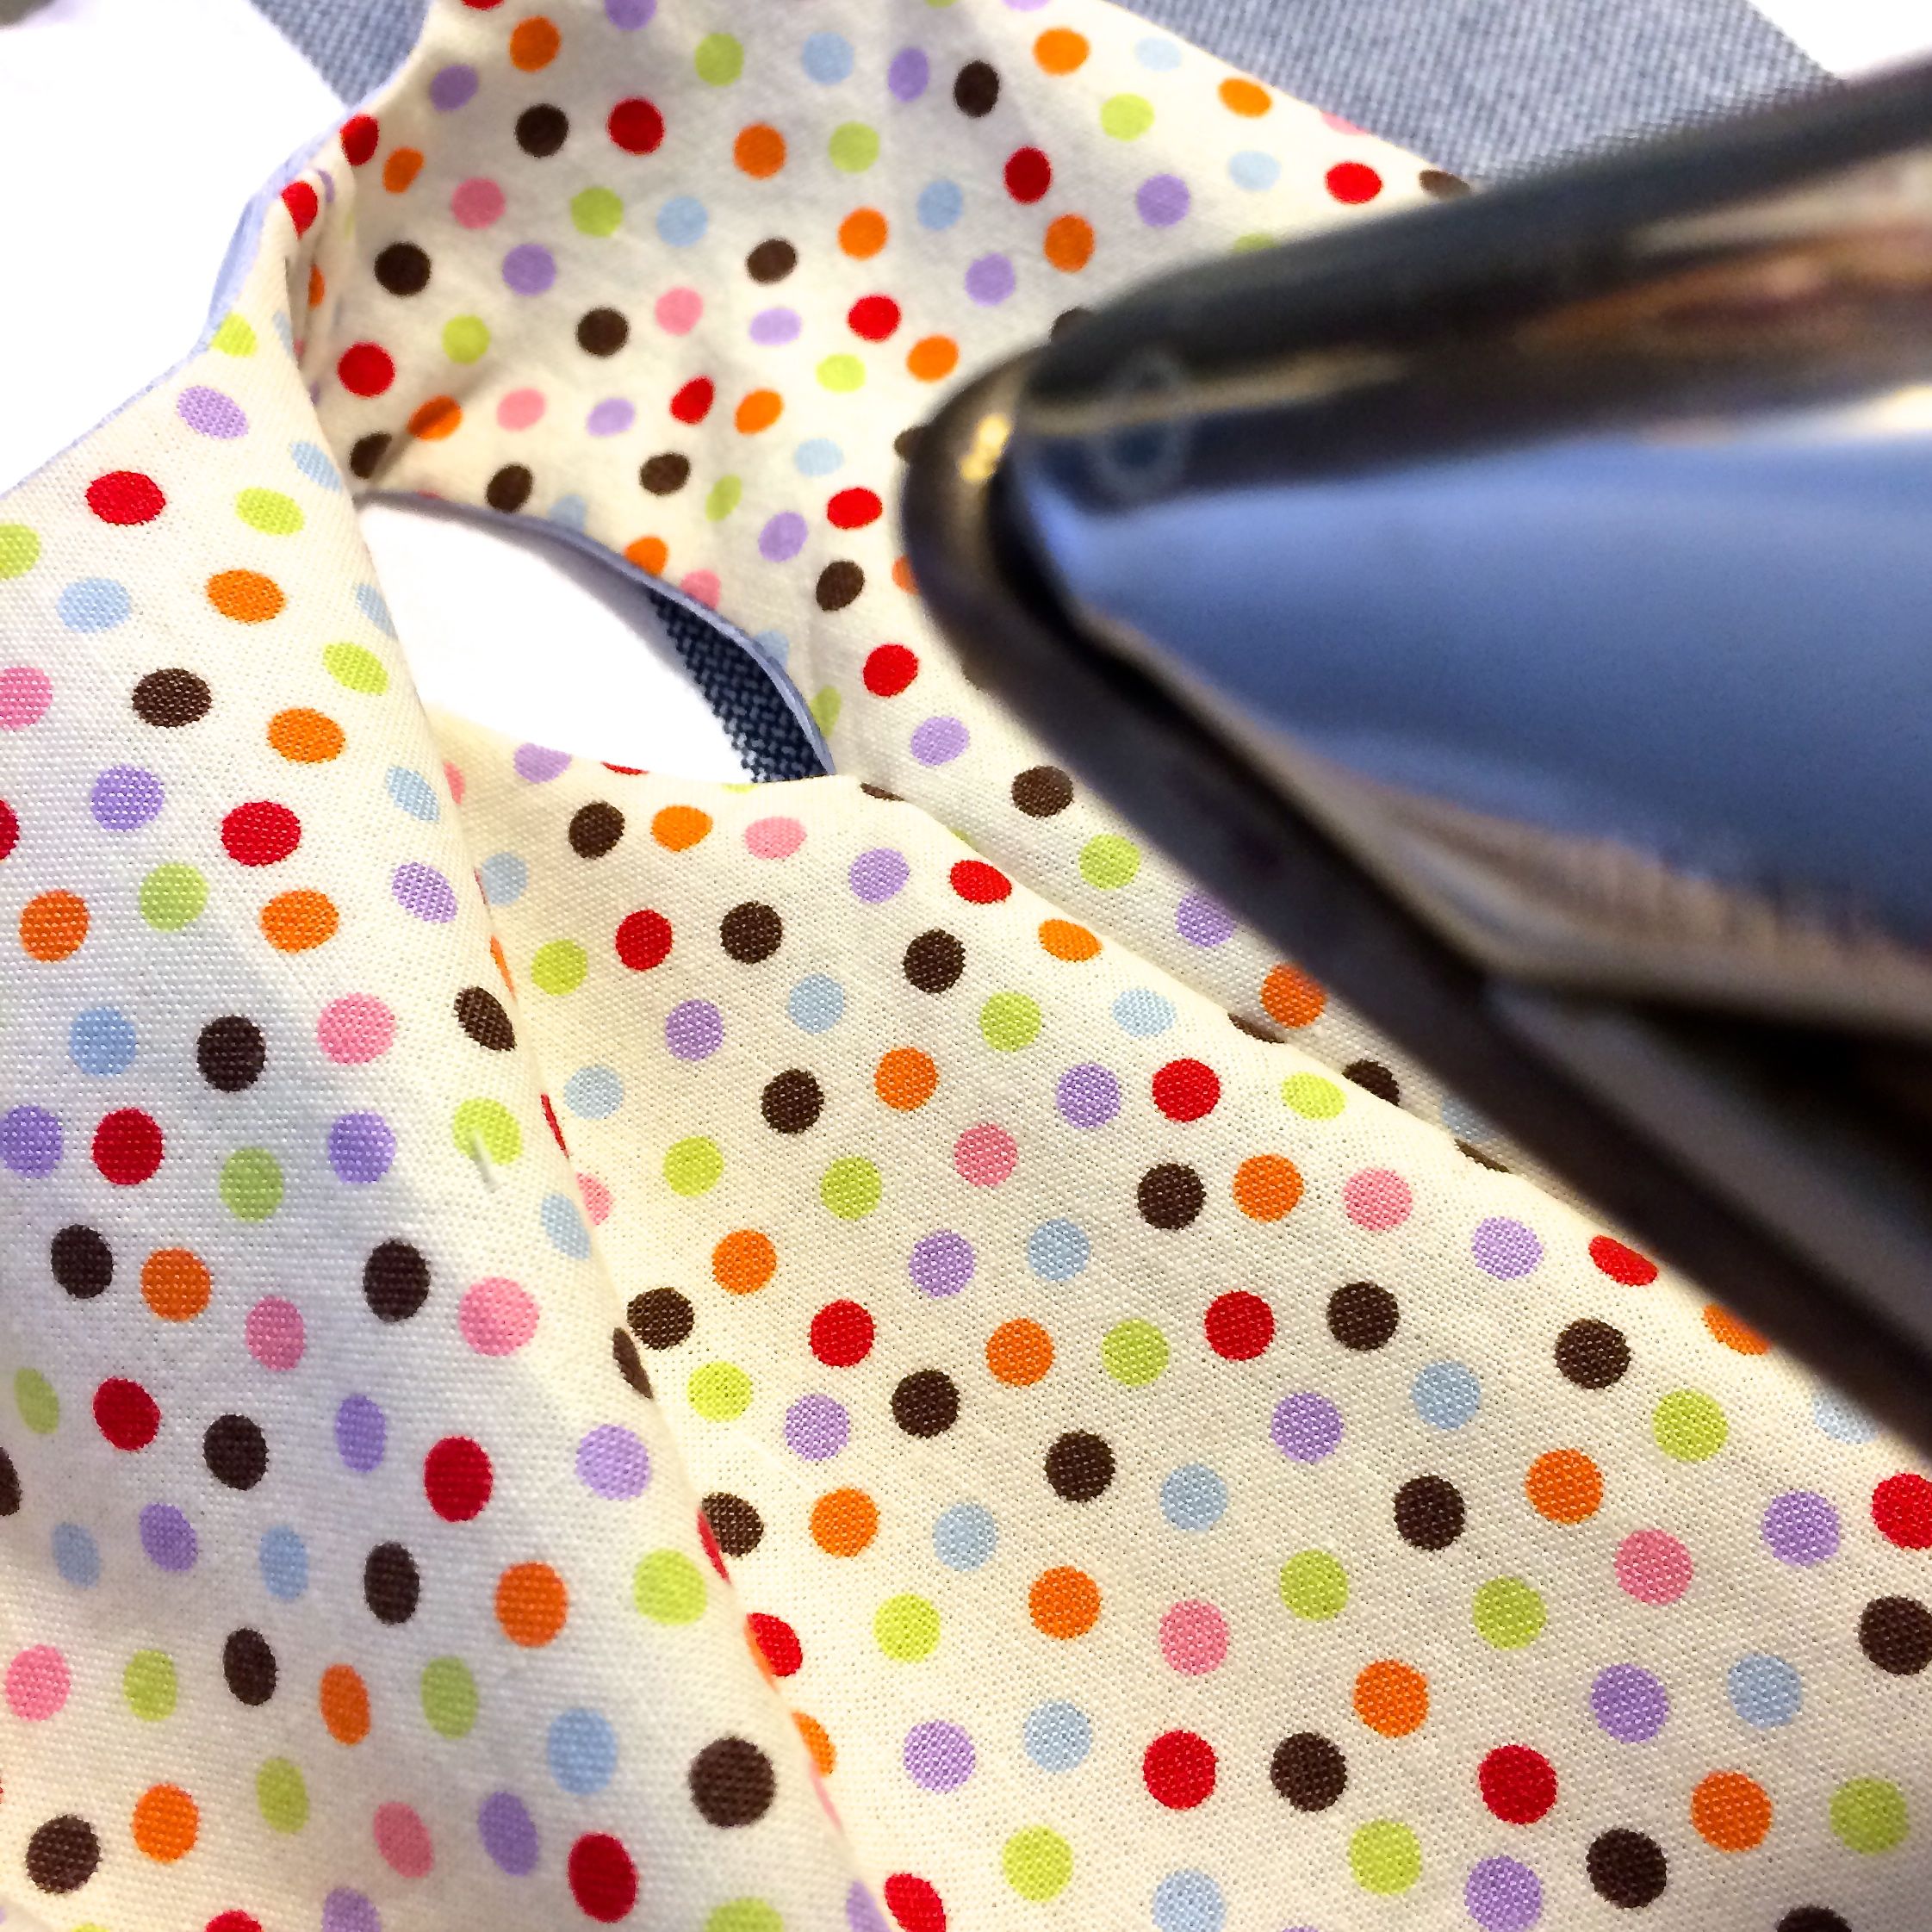
Next sew together the shoulder seams for each fabric as though they were two independent dresses. Press the seams flat.

Pressing seams is a good habit and makes everything look better.

Pressing seams is a good habit and makes everything look better.

  1. Place the two dresses together with rich sides together lining shoulder seams up to match.
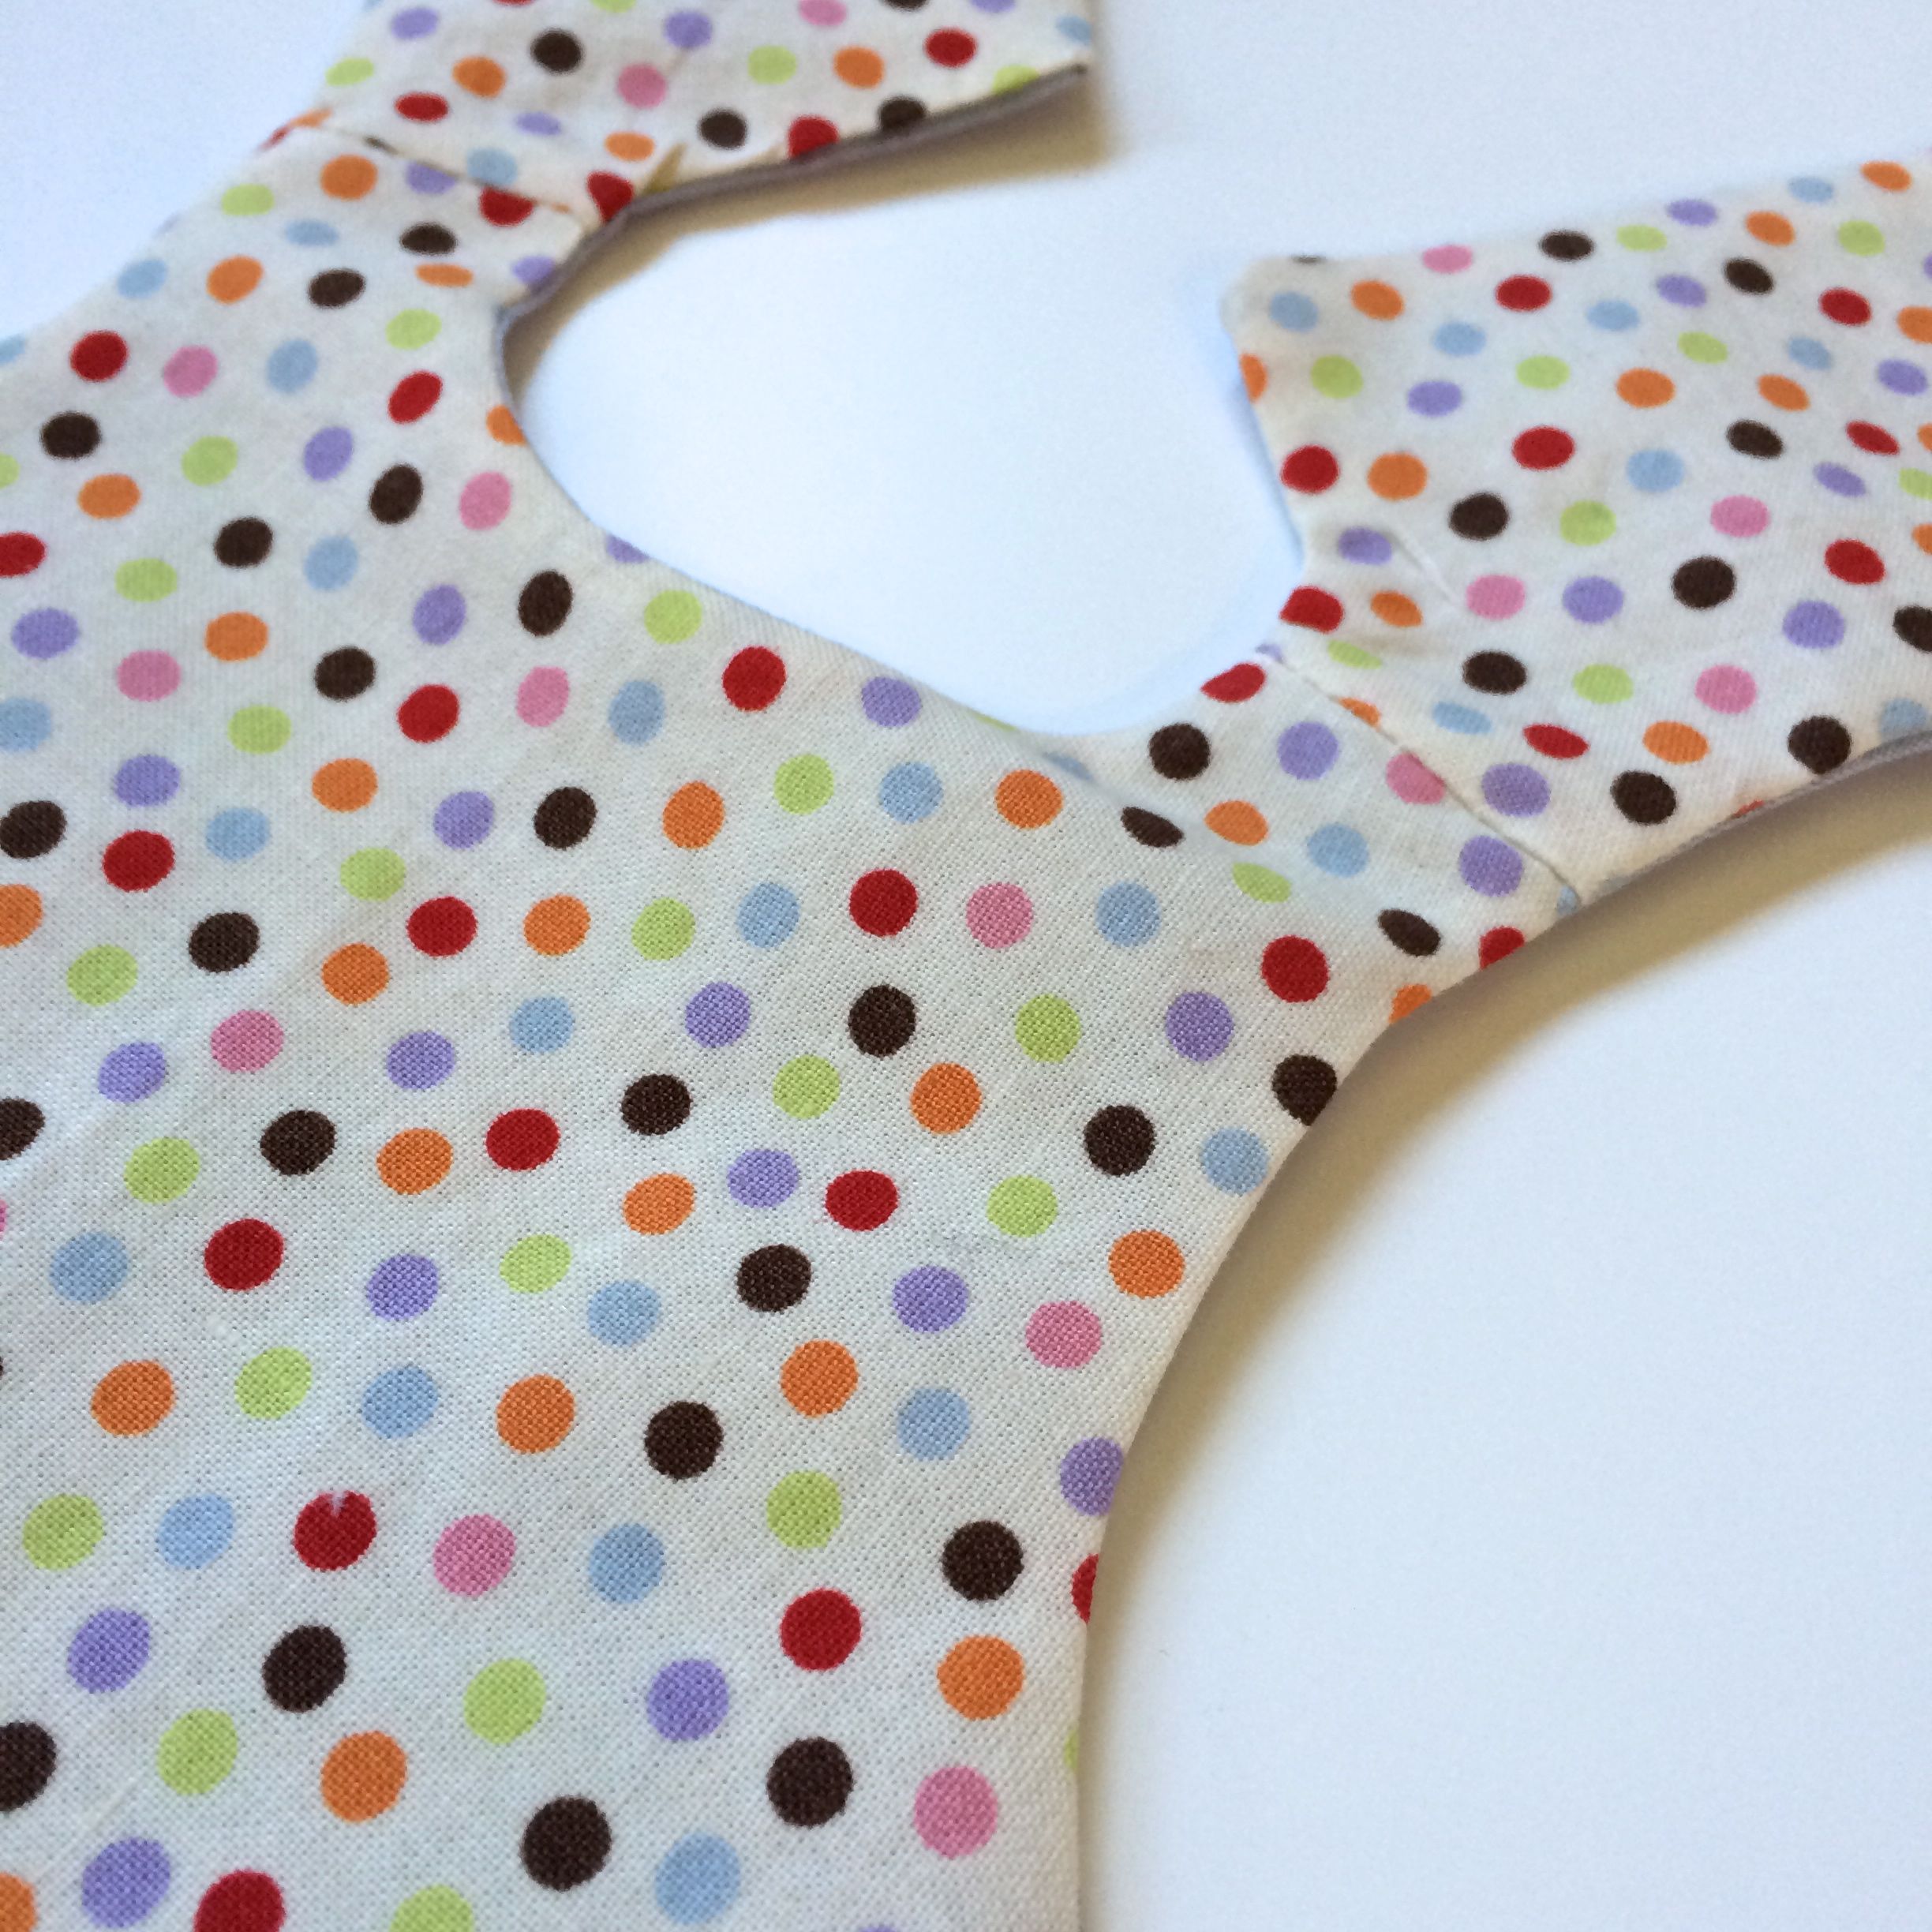
  2. Sew the two dresses together starting from the hem edge of the back opening up the back opening, around the neck and back down the other side of the back (see closeup below). Next sew each armhole edge together (see close up below). Carefully clip curves and cut sharp edge off of the corner.
  3. Turn inside out by pushing/pulling back halves through the shoulder hole.

Click to enlarge image

Close-up  of where to sew your two dresses together.

Close-up  of where to sew your two dresses together.

Once the dress has the right sides out, you will need to neaten things up a bit. First use a semi-pointy something to push your corners out, so they look like corners and not curves. I use a tool called The Purple Thang. But there are a number of things that will work. A size five knitting needle if it isn't too pointy. You don't want to poke straight through the fabric. then press so the edges of your seams are flat.

Use a semi pointy something to push your corners out.

Use a semi pointy something to push your corners out.

Press the neck and armhole seams.

Press the neck and armhole seams.

Next you will be sewing up the side seams, but this is done so in the end the side seams will be hidden. in other words, no inside of the dress with fraying or messy or even visible seams:

Your dress now has four bottom of armhole seams. Two on the right side of the dress, two on the left. Find them.

Match bottom of your armhole seams.

Match bottom of your armhole seams.

Pin your two right armhole seams together with right sides of the fabric together. Do the same for the left side. Pin the side seams together from hem to armhole. Notice on my fabric, I've pinned blue to blue, and dotted to dotted.

Now you will sew from the blue hem to the dotted hem with your pinned together armhole seam in the middle of these two. repeat for the other side of your dress.

Click to enlarge image

Flip your dress right sides out and press. Now only the hem and snaps are left.  You've finished all of the tricky parts. Hopefully they weren't that tricky.

You are so close to done with your reversible doll dress.

You are so close to done with your reversible doll dress.

  1. After pressing flip dress back inside out. Pin and sew hems together leaving a gap for turning back right side out.
  2. Fix your hem corners.
  3. Hand stitch up the small remaining gap in the hem. You can use whip stitch, ladder stitch or edge stitch.
  4. Add snaps and you have a dress, or kind of two.

Would love to hear back from anyone who makes a reversible or lined dress. Send photos or...problems and questions.

Doll Dressmaking Series: Facings 101

How you handle the edges of a doll dress can change the look of the dress. I am going to cover several basic ways to finish edges on a doll dress beyond the basic fold over a quarter inch and machine hem, otherwise known as a single fold hem. Very basic, (a word my older daughter uses as an insult). So what else can you do?

Single fold hem, not my first choice for edging a doll dress.

Single fold hem, not my first choice for edging a doll dress.

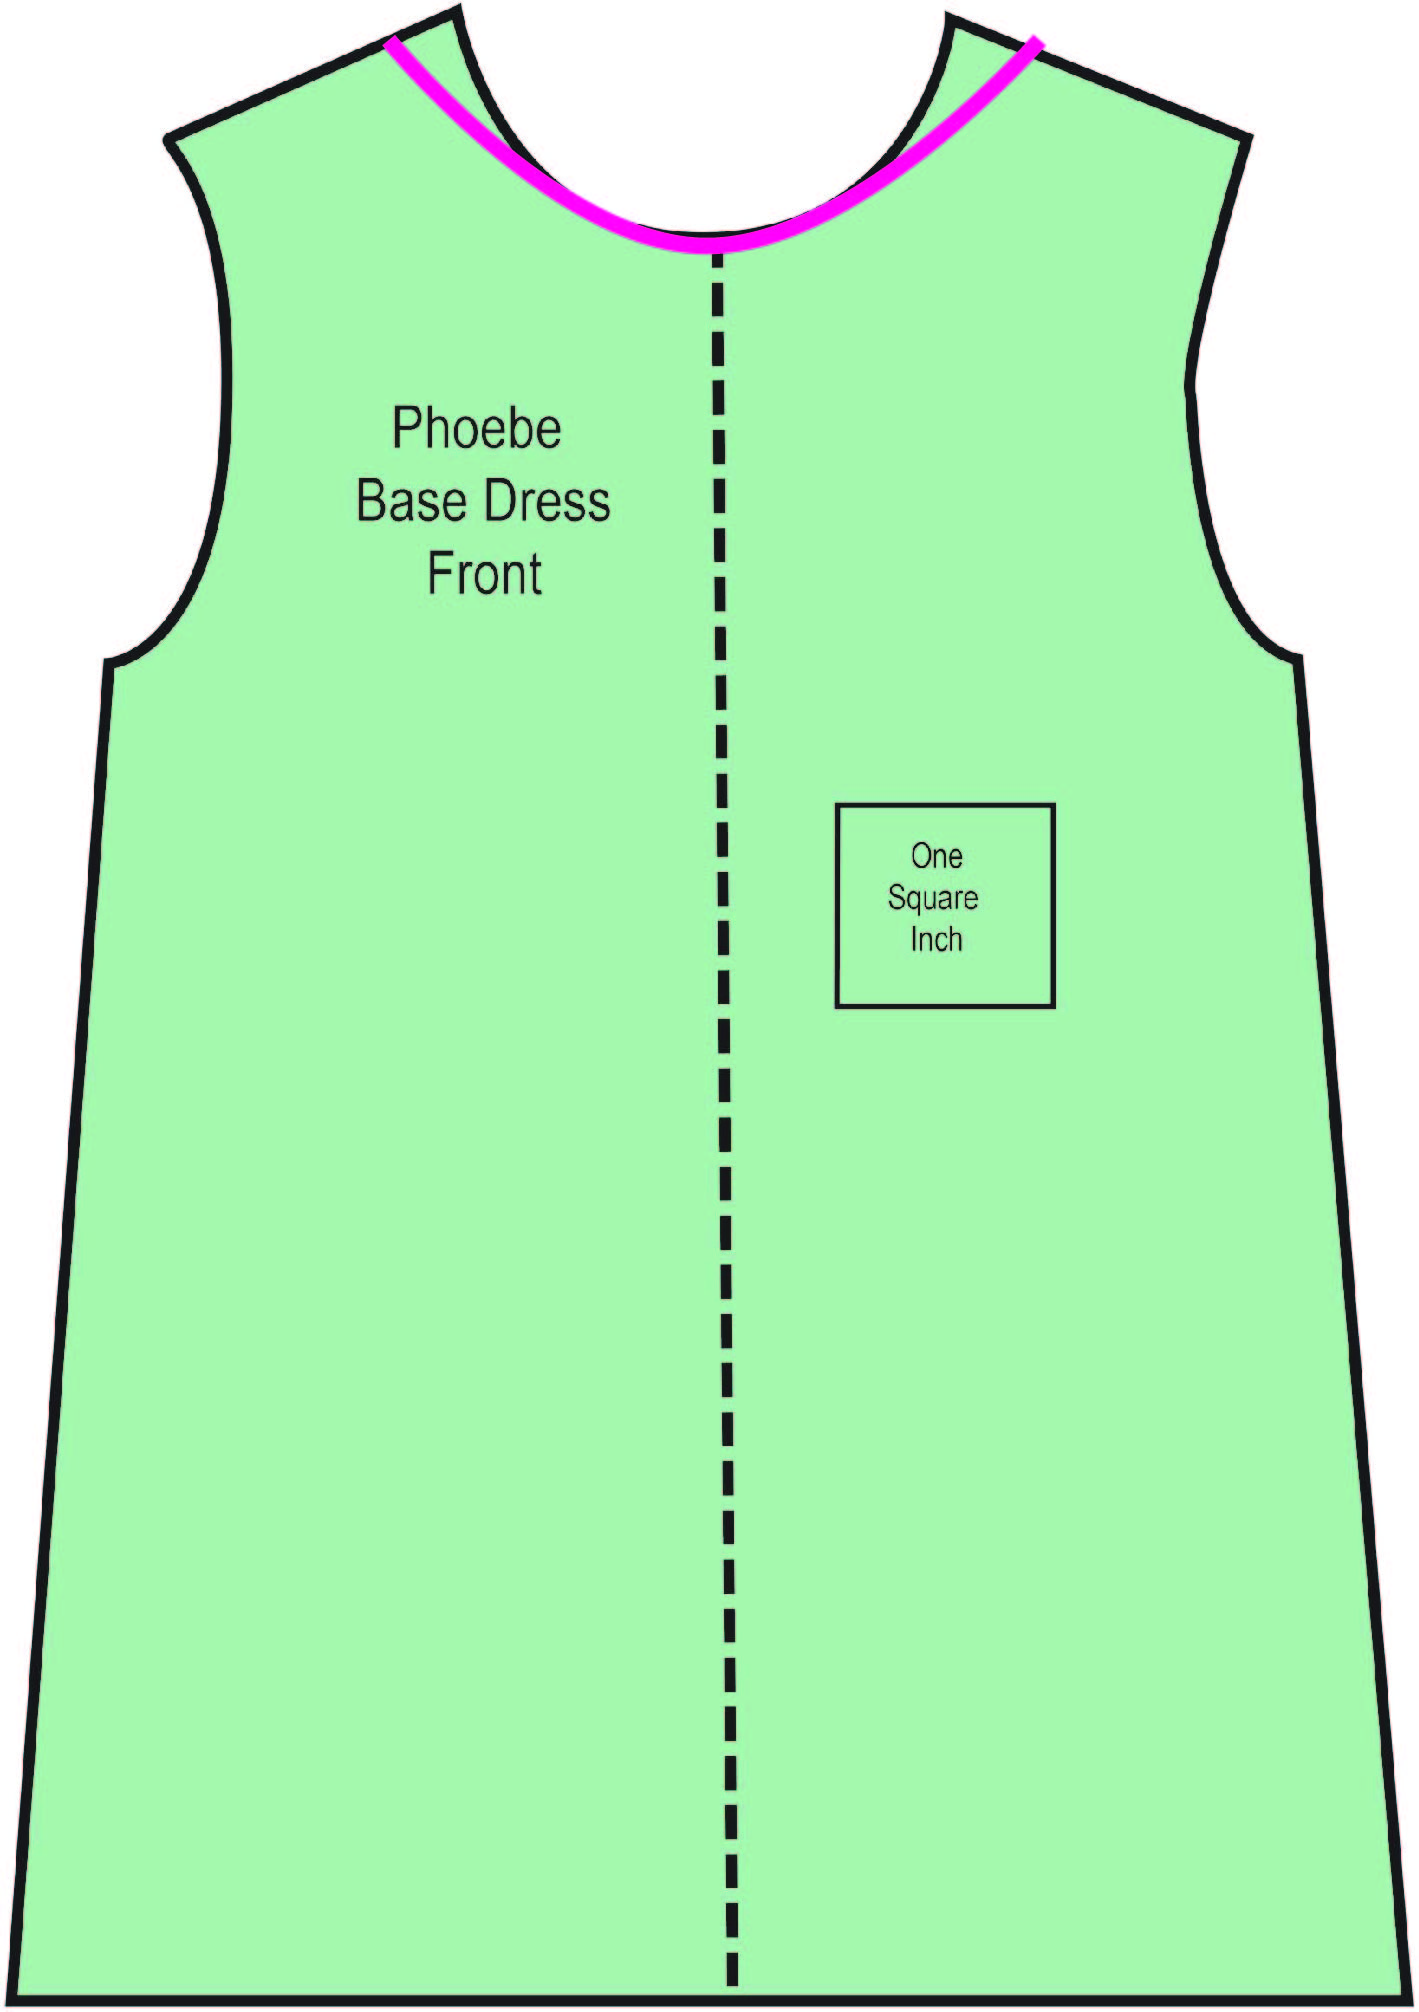
Today, I will show you how to make a simple facing for our basic dress using the basic doll dress pattern (if you don't have one use the link at the end).  The illustration below shows how to make the front facing. 

In pink, the front facing for the basic dress.

In pink, the front facing for the basic dress.

Below shows you how to draw the back facing for the basic doll dress.

Back facing for basic doll dress.

You now should have four pattern pieces, the front facing, the back facing, the dress front pattern piece, and the dress back pattern piece.

1.  Use Figure 1 as a guide for laying them out. If you are using a half of the front for your pattern piece be sure to place it on the fold, likewise for the front facing. I used contrasting fabrics, which adds an unexpected element of fun, but the facing can be the same as the dress fabric.

2. Sew should seams of the facing and the dress, as shown.

3. Press should seams.

4. Machine hem the bottoms of the facing, as shown.


Click to enlarge this image.

Pin and sew facing to dress body for neckline and the armholes RIGHT SIDES TOGETHER.

Sew from 1 to 2,

from 3 to 4, and

from 5 to 6. 

Sew neckline and armholes.

Sew neckline and armholes.

Turn right side out.

Facing turned Right Side Out.

Facing turned Right Side Out.

Sew back edges down as a single fold hem. In another lesson we will cover doublefold hem and serging. 

Single edge hems for the edge of the back.

Single edge hems for the edge of the back.

Press and your basic dress has a basic facing. You can sew up the side seams and you have a simple dress with a simple facing.

Doll dressmaking series: facings

Doll Dressmaking Update

I know there has been a bit of a pause in the doll dressmaking series and I apologize for that. It's been a busy week and now I'm off to enjoy a long girls weekend with my two favorite girls--my two daughters. Next week, school is in full swing, and so am I, and so is the doll dressmaking.

Next topic, facing, linings and how to avoid raw edges.

Until then enjoy the long weekend!
Cuddly Egg gets some clothes

I know I have disappeared for a few days. I've been busy with a few custom orders, Cuddly Egg and mostly enjoying a house full of people this last week before school. Doll dressmaking course will be in full swing as soon as school starts this week, I promise.

In the meantime, Cuddly Egg wants to show off a few new clothes she just received!

First, Baby Egg gets an undershirt and diaper

First, Baby Egg gets an undershirt and diaper

Baby Egg gets a blouse and blommers.

Baby Egg gets a blouse and blommers.

Baby Egg wants you to see the back.

Baby Egg wants you to see the back.

Baby Egg is ready for bed in her cuddly PJs

Baby Egg is ready for bed in her cuddly PJs

Baby Egg is getting sleepy.

Baby Egg is getting sleepy.

Doll Dressmaking Series: Resizing the pattern

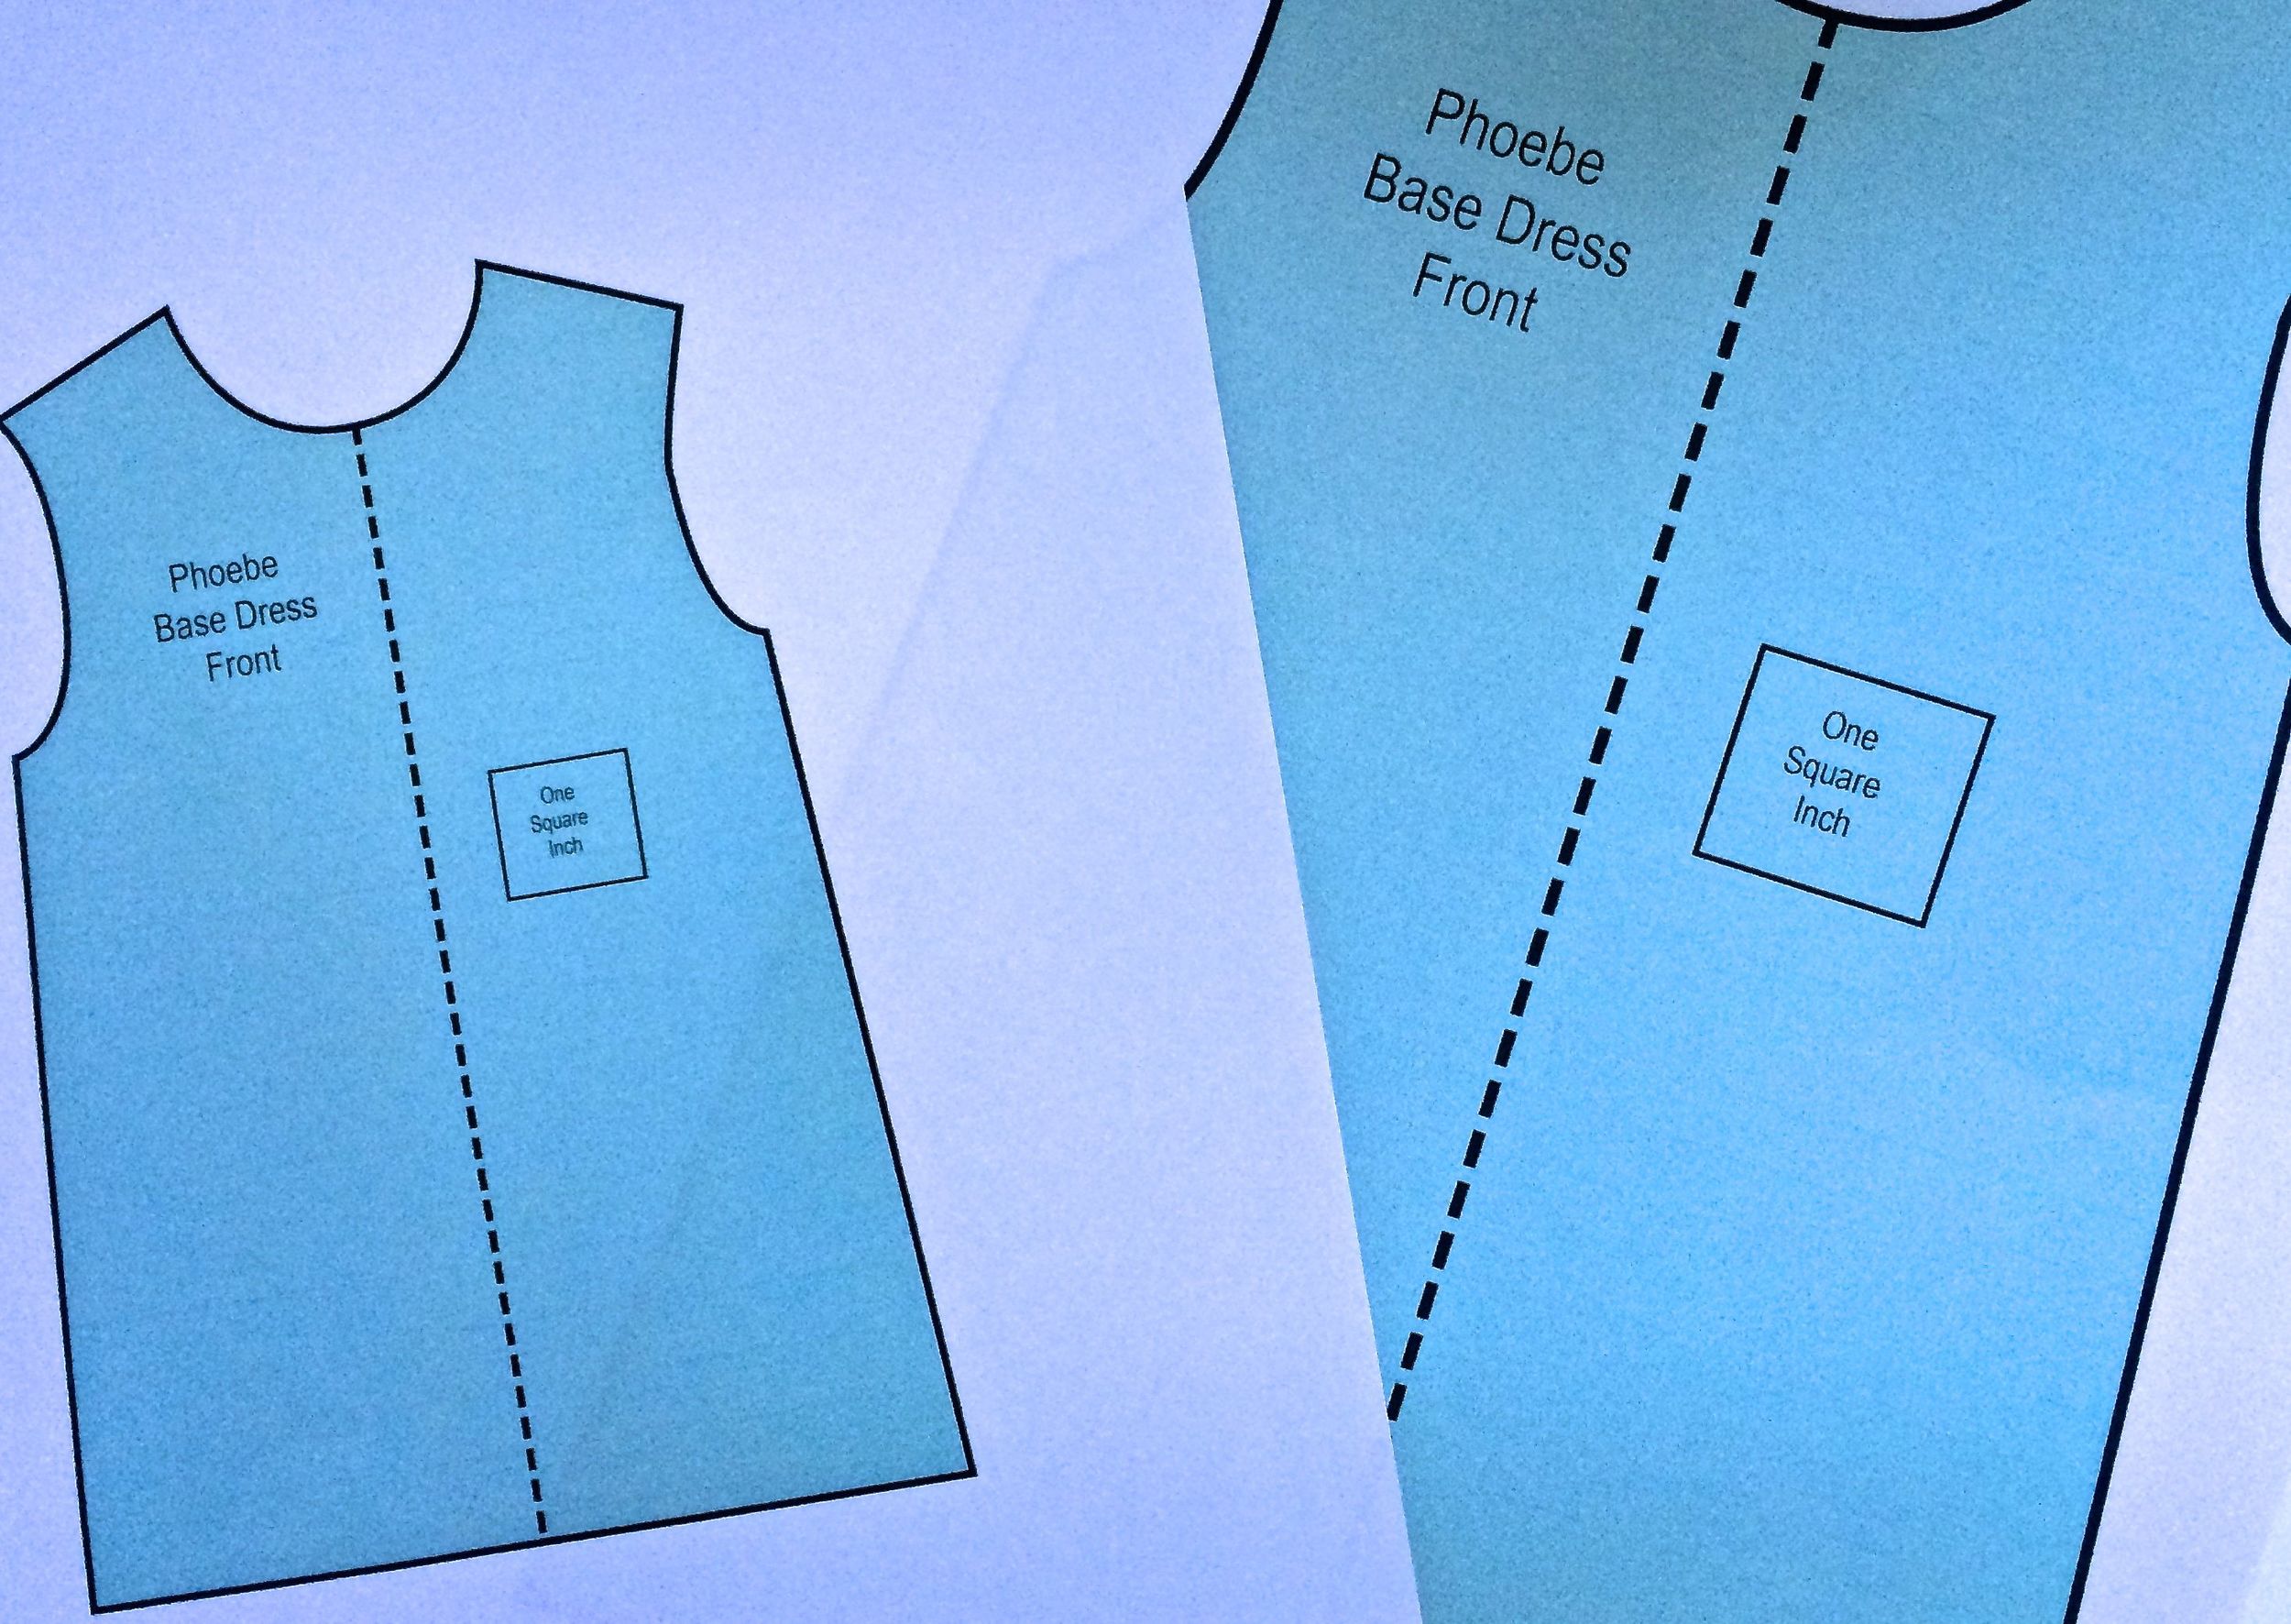
I have made basic dress (the starter pattern) pieces for Phoebe dolls, American Girl Dolls and a 16 inch Waldorf dolls. However, you may want to sew for a different doll. In addition, not all dolls of the same brand are the same size. American Girl doll sizes have varied quite a bit over the last 20 years. And handmade dolls like Phoebe and Waldorf dolls can vary simply because they are handmade.

There are three ways to alter the size of a pattern. In order to know how much you need to change, I suggest starting with making a crude version of the dress from the pattern you think is closest to your doll size.

For those of you new to sewing, click here for the basic steps for making the basic fitting dress.

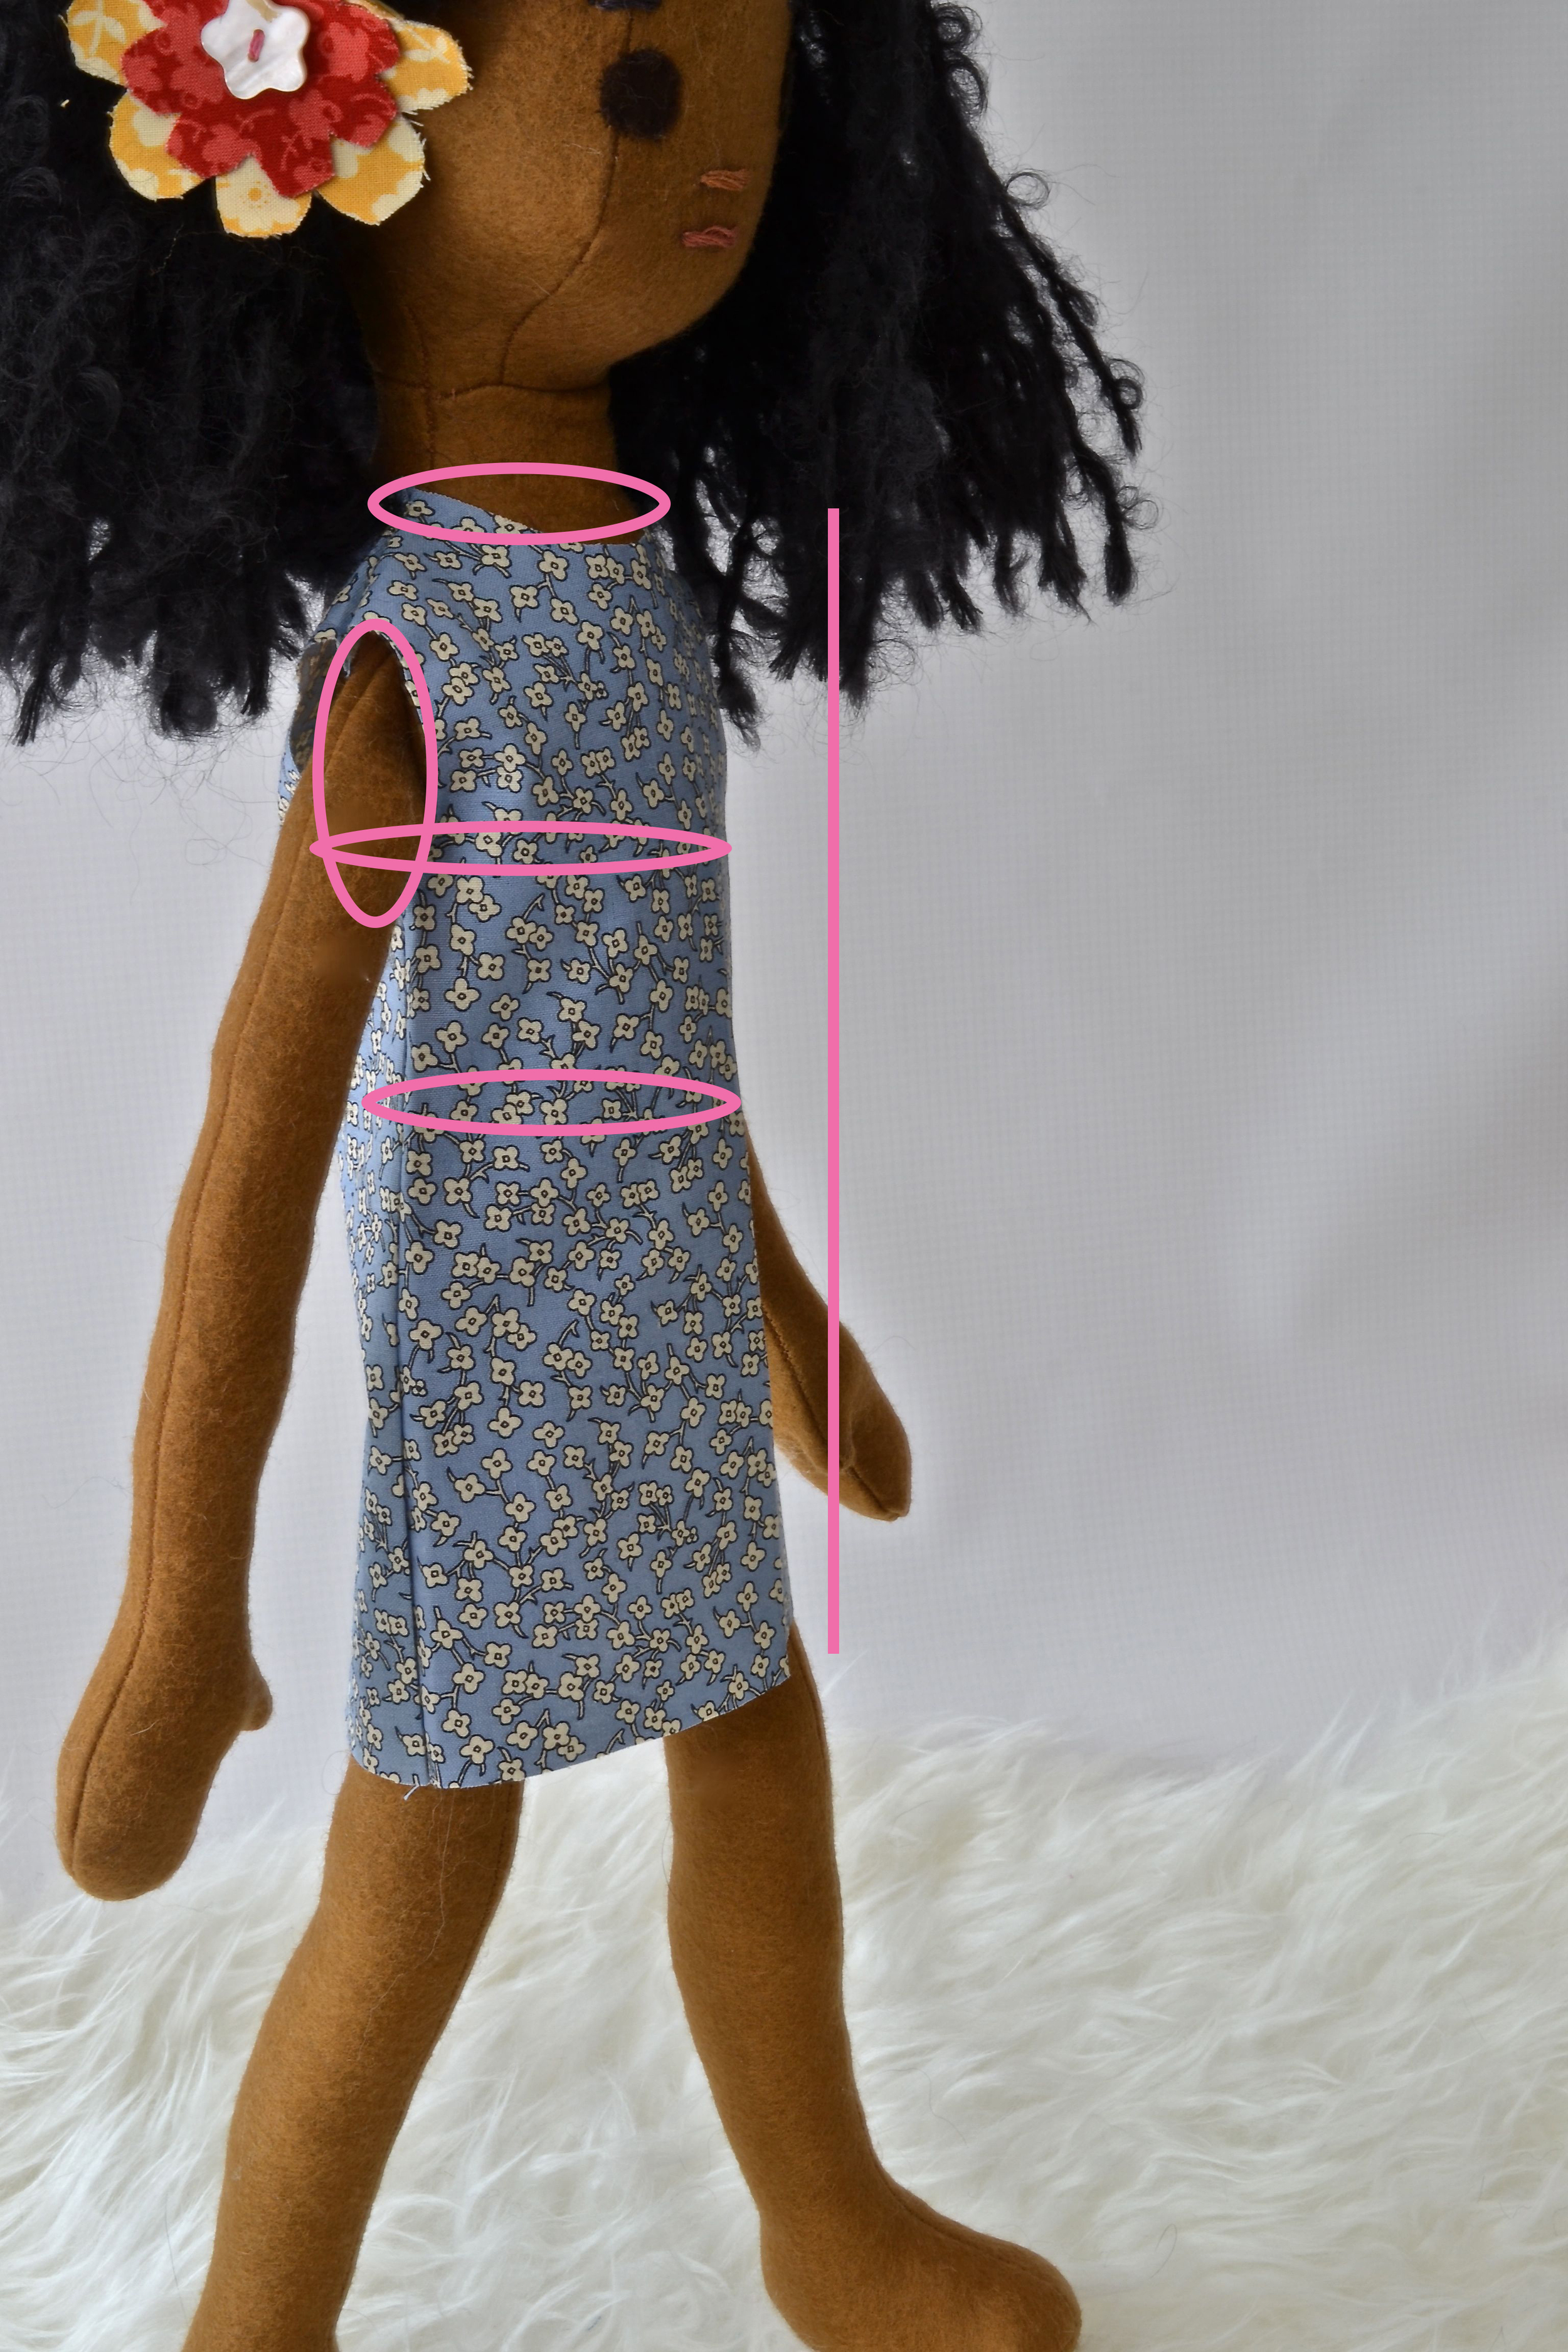
Key areas for adjusting fit in a doll dress

Key areas for adjusting fit in a doll dress

Once you have made that dress, try it on your doll.  and answer the following questions:

  1. Is it too big or too small?
  2. Is it too big or too small all over or in just one or two places? Look at the neck hole, armholes, chest and waist.
  3. How is the length? Remember to take into account a 1 inch hem.

There are three ways to alter a pattern to fit. Which way you go with depends on what type of size change you are attempting.

Too Big or Too Small Overall

If the pattern is overall too big or too small (meaning neck, chest AND armholes), you can easily adjust the pattern with an enlargement or reduction on the copier.  It just requires a bit of math. If a doll's chest is 10 inches and you need 11, then copy it at 110%. Or you can use the pattern pieces to do the math. If a 6.5 inch pattern piece needs to be 7.5, divide 7.5 by 6.5 and you get the percentage of enlargement, 115%. 

Using a copier to change pattern size

Using a copier to change pattern size

Three things to remember about using the copier to enlarge or reduce. 

1. It only really works if all of the measurements need to be uniformly (or almost uniformly) reduced or enlarged.

2 It should not be used for making a dress pattern longer or shorter, just for circumference changes. A doll may be taller but thinner, so the dress's width should not be increased, just length, which is easy to do without the copier.

3. You are also enlarging/reducing the seam allowance. If you are only changing the pattern within 20%, this won't matter so much, but more than that can have an impact. Most doll clothes are sewn with a 3/8 inch seam allowance.

Just Need to Increase the Width

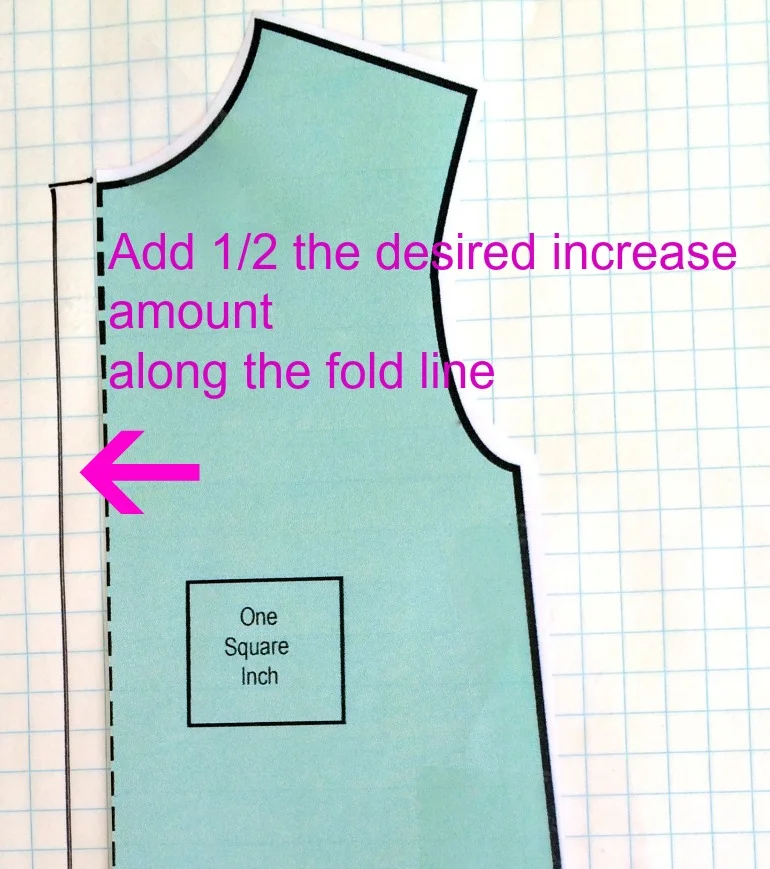
Okay so the armholes are loose enough, but the dress is snug. This can be done by adding a segment onto your pattern piece either with tracing paper or by taping your pattern piece on a piece of graph paper. See sketch below.

If the dress front is one inch too narrow, add a half of an inch to the fold edge. You can create a new pattern either by cutting out the graph paper with the taped on piece.

Altering a pattern piece for width only

Altering a pattern piece for width only

Just the Neck is Too Tight

Some dolls have narrow necks, some dolls have wide necks. If it is just the neck that is not fitting, the fix is quite simple. You can draw a wider neck on the pattern piece as depicted below. A bit of guess work is involved. But it doesn't take that long to make a sizing dress to try. Or you can cut your sizing dress until it fits and work backwards.

Neckline change.jpg

Next, facings and linings.

A New Baby: A New Egg Doll

For months now I have been trying to redesign Baby Egg. We have Chill Phoebe, who is a more relaxed version of the original Phoebe doll. I have always wanted Chill Phoebe to have a compatible baby sister: Egg.  

Finally I am happy to introduce the New Egg! I think she will be named Cuddly Egg because that is exactly what she is. 

A New Cuddly Egg

A New Cuddly Egg

Hello Egg!

Hello Egg!

Phoebe's Baby Sister: Egg

Phoebe's Baby Sister: Egg

New Baby Egg takes a break from modeling 

New Baby Egg takes a break from modeling 

Doll Dressmaking Series: Base Patterns are ready

I have heard from a number of people that they are excited for this doll dressmaking series. I am too! I hope to teach both how to make patterns for a variety of dress styles from a base pattern and some techniques to help you sew small.

I know I said the base patterns would be done on Monday. I have been working hard both to learn Illustrator and trying to figure out how to post the patterns so everyone can download them easily. The good news is the base dress patterns are ready for Phoebe, American Girl Dolls and 16 inch Waldorf dolls. So yay! We can begin!

The second part of the news is there is no simple way through Squarespace (the people who host this website) to upload the patterns so you can download them. So here's how it will work: I have made a form at the end of this post, just email which ones you want and I will send the PDFs to you. 

I have started with these three sizes because I am assuming they are the most popular, but I am willing to add another size Waldorf or Toddler Phoebe if there is interest. But I will also be showing you how to adjust this pattern to fit a slightly different size doll. So no matter what, you win.

A series on designing and making doll dresses. 

A series on designing and making doll dresses. 

Please fill out the form at the bottom and I will send you the PDF of the pattern, Once you have that you can begin.

The next blog post is the first lesson to start once you have your pattern pieces.

The base pattern

The base pattern

The base pattern is where we start. Next lesson, making sure it fits your doll!

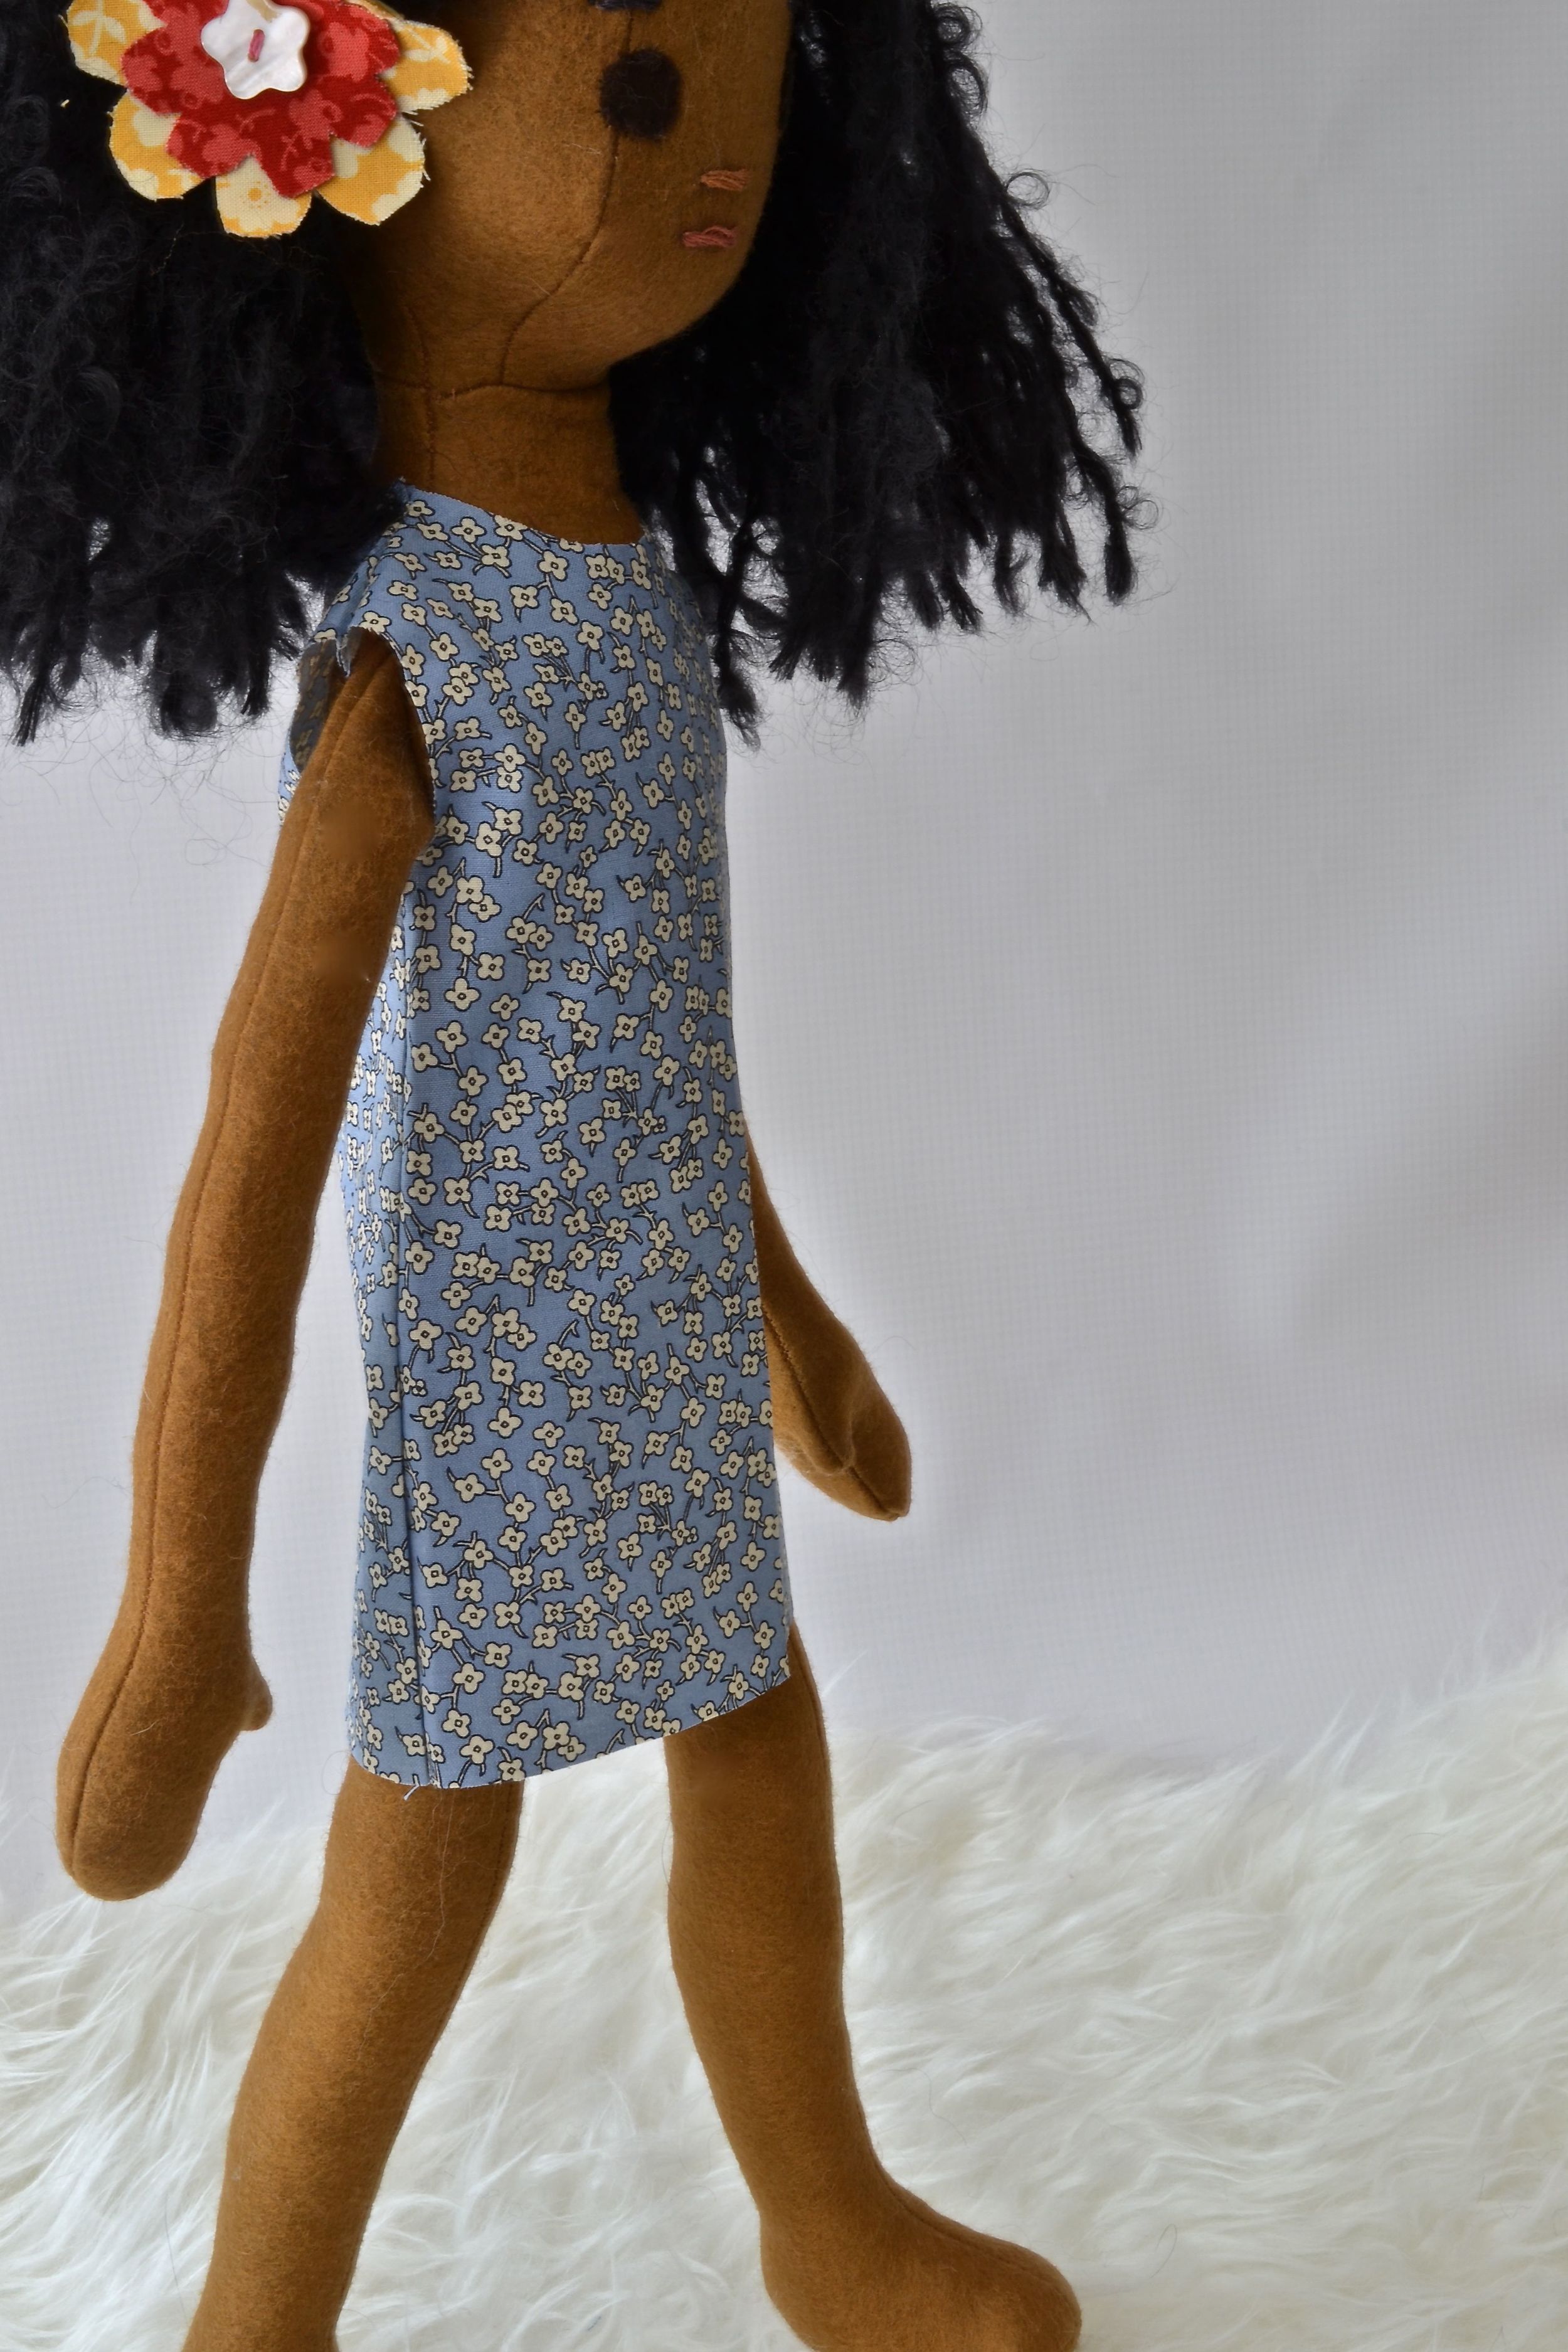
Phoebe modeling the base pattern pieces.

Phoebe modeling the base pattern pieces.

Subscribe to my newsletter to receive all pattern pieces, past, present and future.

Subscribe to our mailing list

* indicates required

Beloved Handmade Doll Dress Contest

There were 7 very sweet entries into the Beloved Handmade Doll Dress Contest. I love every one of them and their stories. Thank you for to the people who submitted!

For those of you just jumping in click on the image below to bring you to the original contest. The rest of you just scroll down.

I have been delaying on posting the contest because I've been struggling with the mechanics of voting. Since there are only 7 dresses, I have reduced it to two categories, sweetest dress and sweetest story. There is a form at the end of this post for voting.  All of the info in the vote is confidential. I will just tally and report back.

So here are the beloved handmade doll dresses:

Handmade Doll Dress #1

Handmade Doll Dress #1

The story to Handamde Doll Dress #1: This little pink lace overlay dress was made by my Mom for me for Christmas when I was about eight, along with a stunning handmade doll. Being eight, I was a bit disappointed that it wasn't the latest fad Barbie doll, but I quickly grew to really treasure the special doll that my mom had made for me, and played with her tons! Sadly, dolly has gone missing, but I am hopeful that she might turn up the next time Mim cleans her storage room!

Handmade Doll Dress#2 (photo from Instagram)

Handmade Doll Dress#2 (photo from Instagram)

Handmade Doll Dress Story 2: Doll dress that was lovingly made by my grandma in the 1950s for her daughter. I played dress up with it on my dolls as a child and now my daughter does with her dolls.

Handmade Doll Dress #3 (also from Instagram)

Handmade Doll Dress #3 (also from Instagram)

Handmade Doll Dress #3: My mom made me a handmade doll with this dress when I was little. I remember thinking the dress with all its lacy goodness, was so beautiful. Now I keep it in my living room. It brings back so many happy childhood memories I can't bear to pack it in a box

Handmade Doll Dress #4

Handmade Doll Dress #4

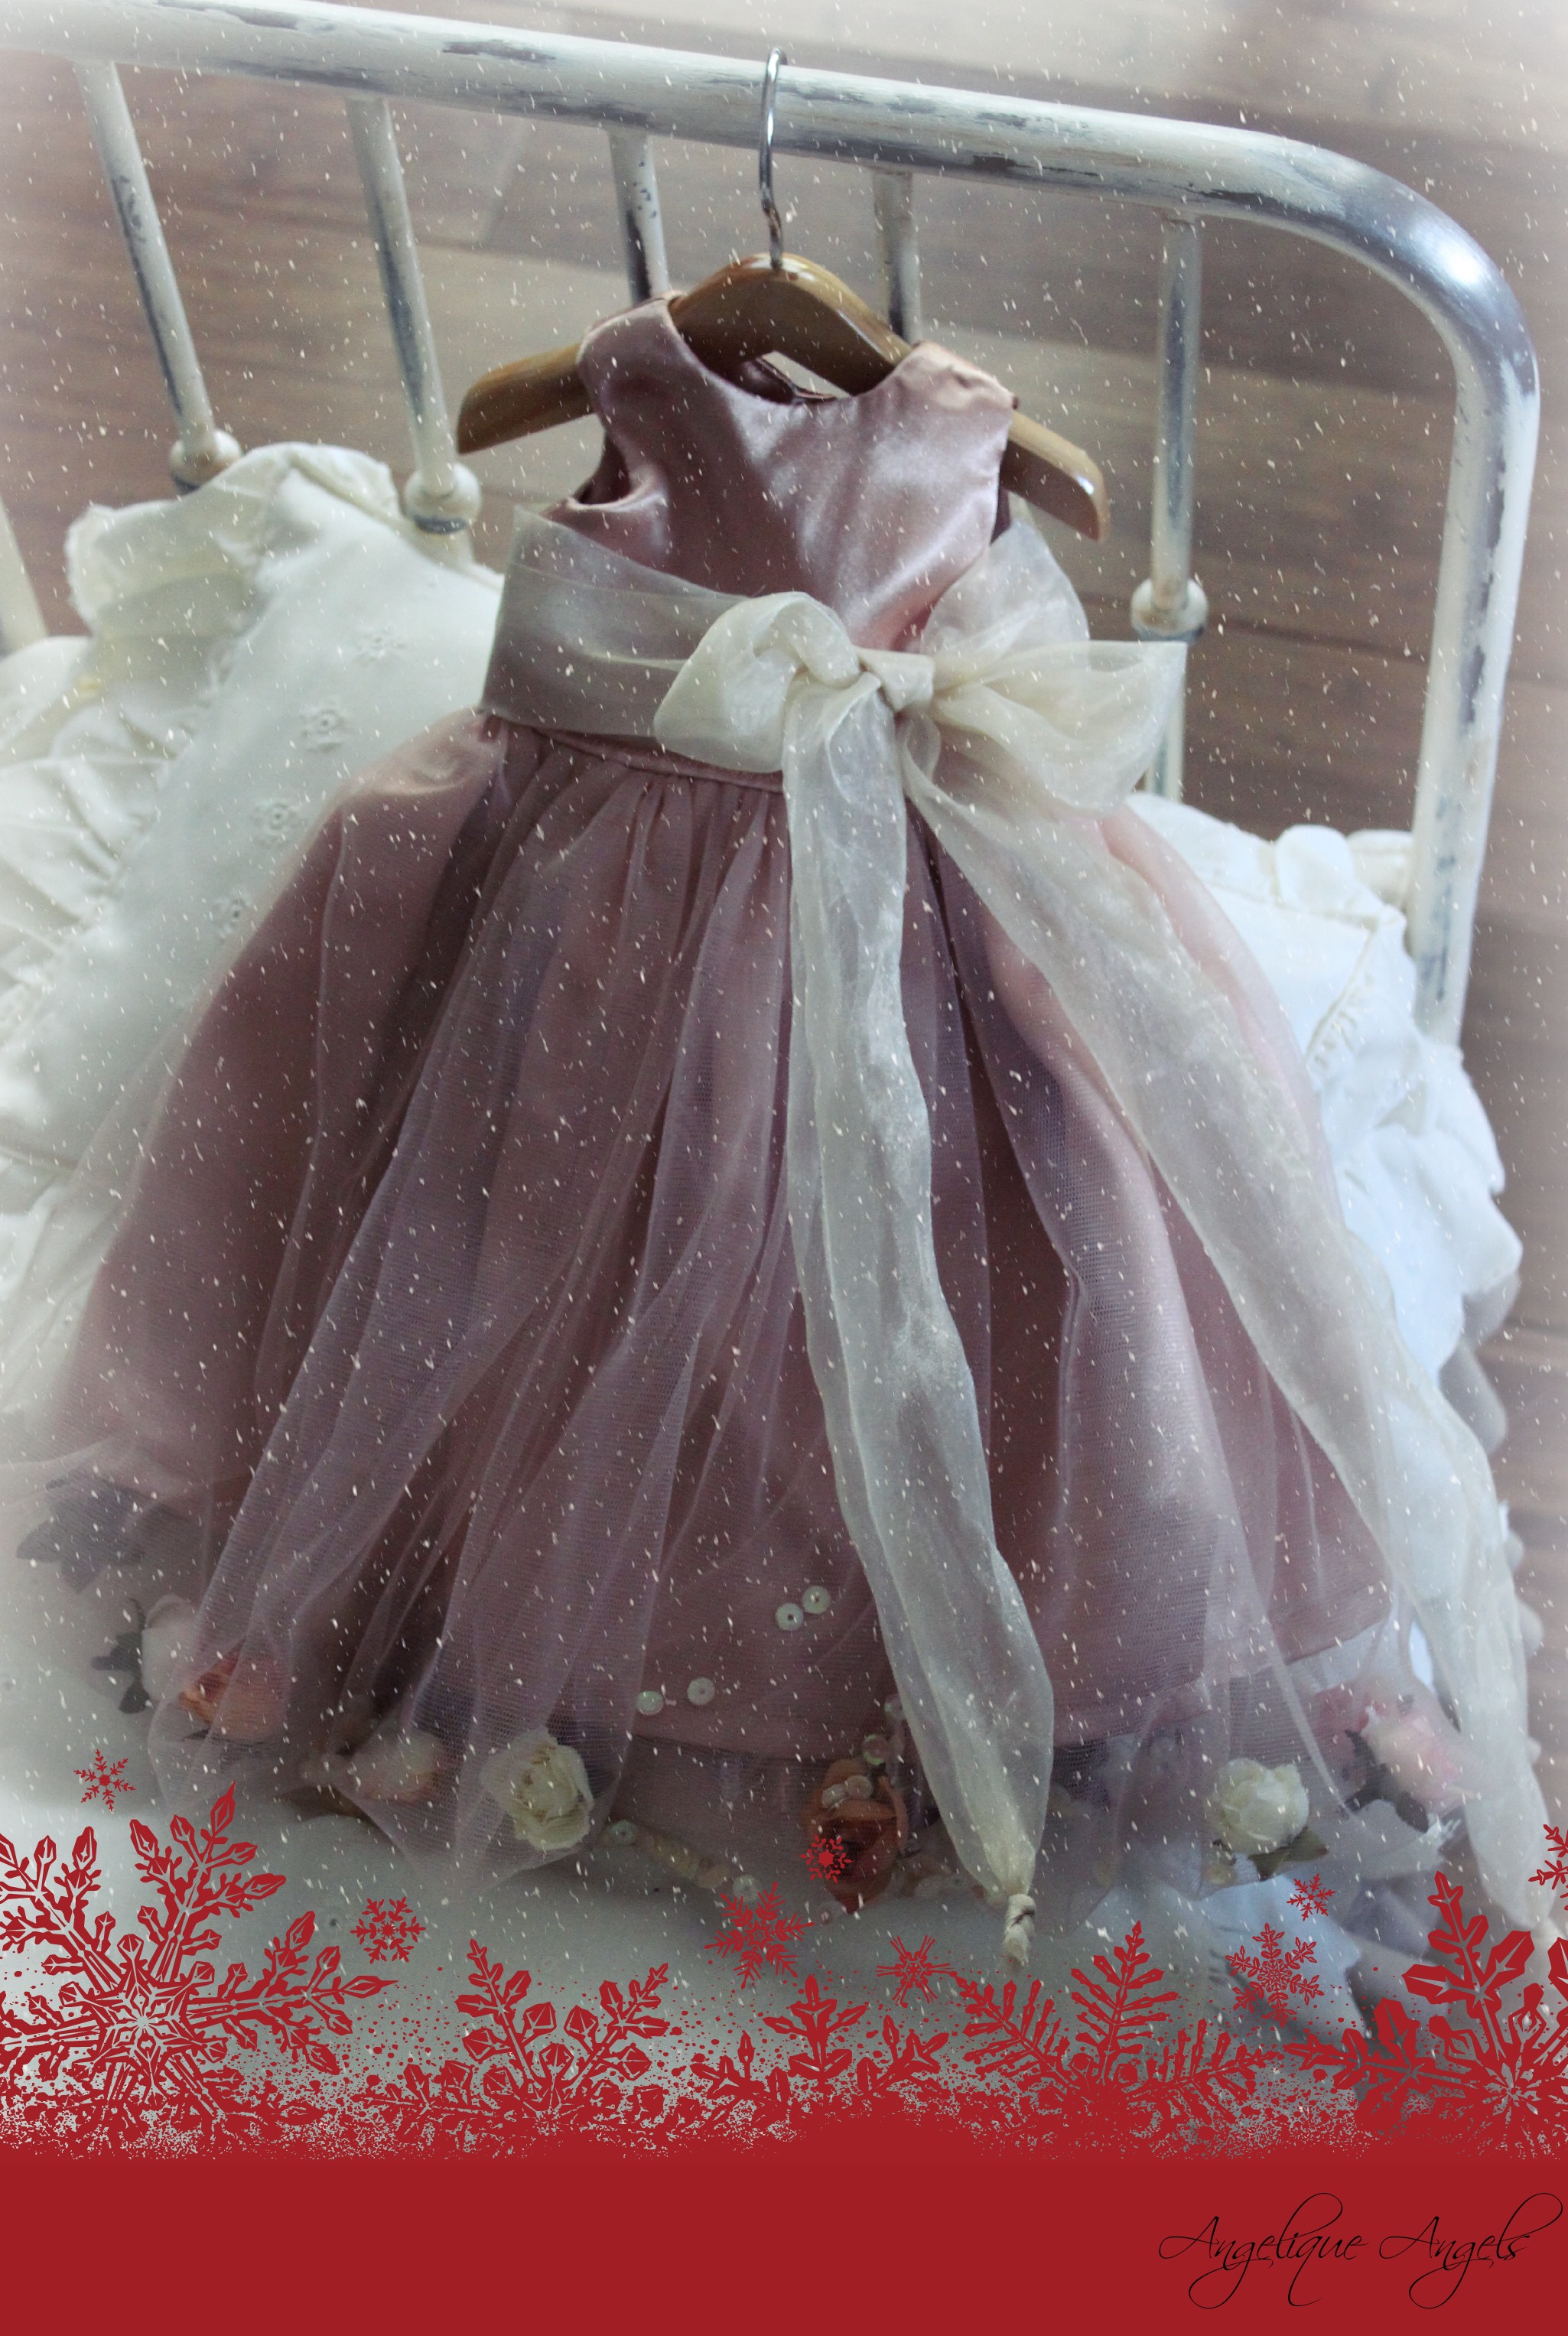
Handmade Doll Dress #4: I just love to see a doll dressed in a party dress. This dress uses some of my favorite party dress elements. Tulle, satin, organza and silk roses. There are also Czech glass beads and sequins.

Handmade Doll Dress #5

Handmade Doll Dress #5: My mom made this set for my American Girl doll. We studied the catalog photos and tried to copy the real set exactly so my friends would think I got the real deal

Handmade Doll Dress #6

Handmade Doll Dress #6

Handmade Doll Dress #6: The dress I am entering for this contest has some very special memories.  I made this for my daughter Sabrina for her dolly on her first birthday in 1991.  The doll it was made for was mine when I was a little girl, bought for me by my dad at a yardsale for 25 cents when I was 5 years old.  I also made a matching dress for Sabrina as well

Handmade Doll Dress #7

Handmade Doll Dress #7

Handmade Doll Dress #7: I made this handmade doll dress for a dearly beloved doll who is a sweet Princess. This dress and it's soft color palette captures that innocence and sweetness of the doll.

The two winners will receive a package of fabric and trims for doll clothing.

Thanks so much for participating!